
Smackdab is all about making your workflow smoother and more tailored to your needs. One of the key ways to do this is by adding new field types .
Whether you need to add new fields or tweak existing ones, Smackdab makes it easy.
Enhancing your data organization by creating custom fields ensures you capture specific information relevant to your business needs.
Here’s how you can do it:
Navigate to Field Settings
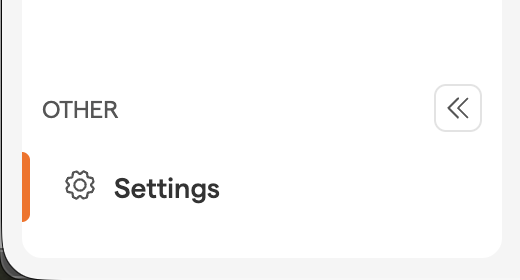
Go to "Settings"
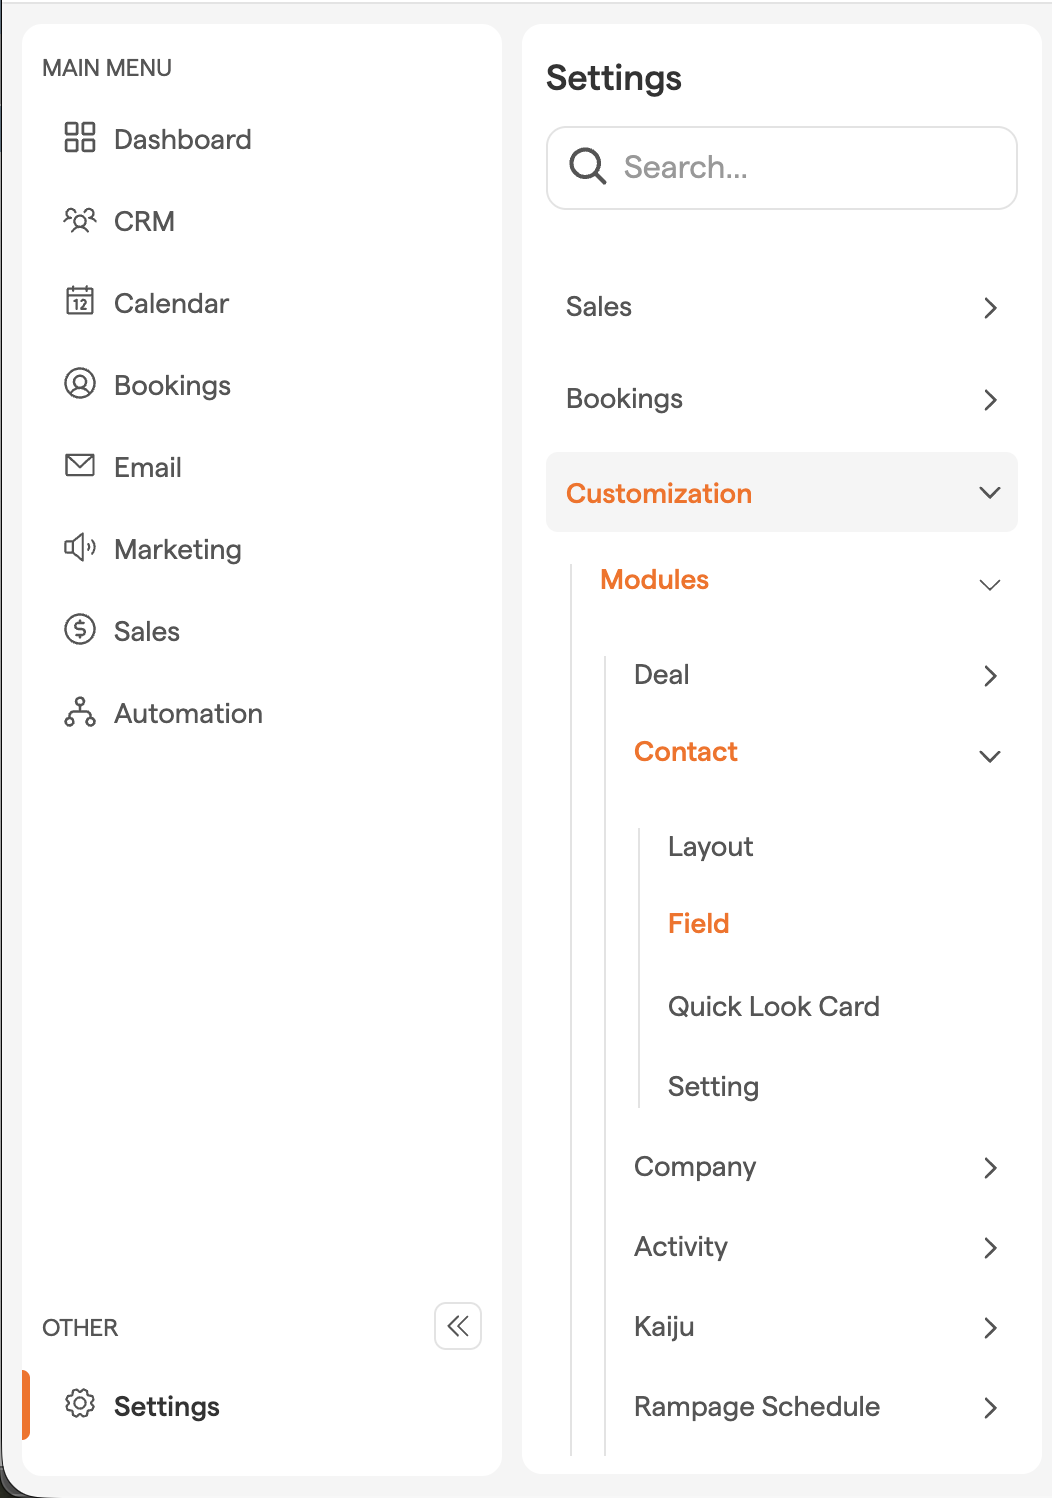
Select "Customization"
Select "Modules"
Choose the Module for Your Custom Field
To add a new field, start by selecting the module where you want it to appear.
Module |
Overview |
Link to Overview of Detail Page |
|---|---|---|
Deal |
Used to track potential sales opportunities, stages, values, and associated contacts and companies |
|
Contact |
Represents individual people you’re engaging with |
|
Company |
Represents businesses or organizations |
|
Activity |
Logs events like calls, meetings, or tasks related to contacts, deals, or companies |
Click on the module that best fits your needs, and you’re ready to create your custom field!
Select "Field"

From here, you can add new fields or update existing ones based on your specific requirements. See below to learn more!
How to Add a New Field
Need to capture additional information? Adding a new field is simple:
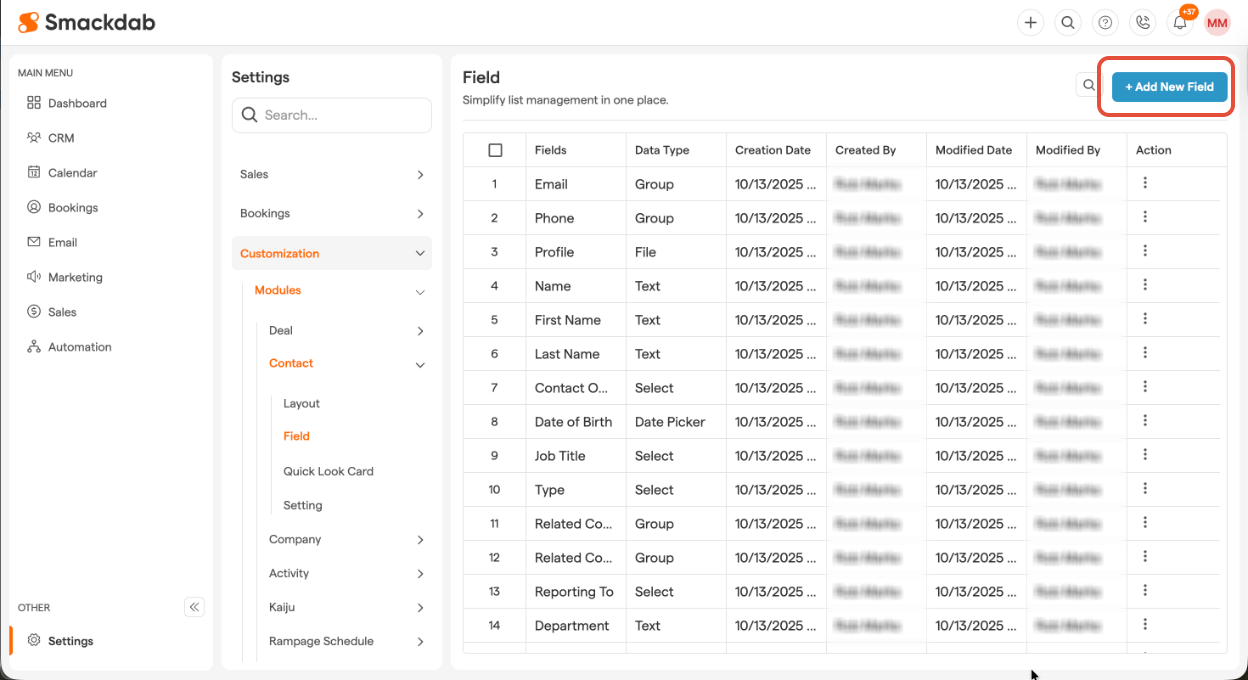
Select "New Field"
Click on the "New Field" button in the top-right corner.
Field Type
Choose the field type (text, number, dropdown, etc.) from the drop-down menu.
The table below gives you a high-level overview of each field type, making it easier to understand their purpose.

Since every field type is dynamic and comes with its own set of options, you can dive deeper by clicking on the field name to explore its details.
Field Type |
Description |
|---|---|
A basic input field for short text entries. |
|
A multi-line text area for longer entries. Supports rich text formatting. |
|
A selection field with predefined options. Supports single or multiple selection. |
|
A date picker for selecting a specific date. Includes validation options. |
|
A time picker for selecting a specific time. Includes validation options. |
|
A combined date and time picker. |
|
Allows users to select a range between two dates. |
|
A field for entering email addresses with domain validation options. |
|
A numeric input field with min/max validation and custom multiples. |
|
A number input that allows percentage values with decimal points. |
|
A numeric input field with currency selection. Supports decimal values. |
|
A field for adding website links with domain validation options. |
|
An address input field with optional autocomplete. |
|
A phone number input with or without a country code. |
|
A single-selection input where users choose one option from a list. |
|
Allows users to select multiple options from a list. Includes min/max selection validation. |
|
A file upload field with allowed file type and size validation. |
|
A collection of fields grouped together. Includes shared field and validation options. |
|
The Rich Text field lets you add formatted content |
|
The Rich Text field lets you add formatted content |
|
Select |
Allows you to choose a selection from a drop-down list, with single or multiple selections. |
Name the New Field
Name the field and set relevant properties.
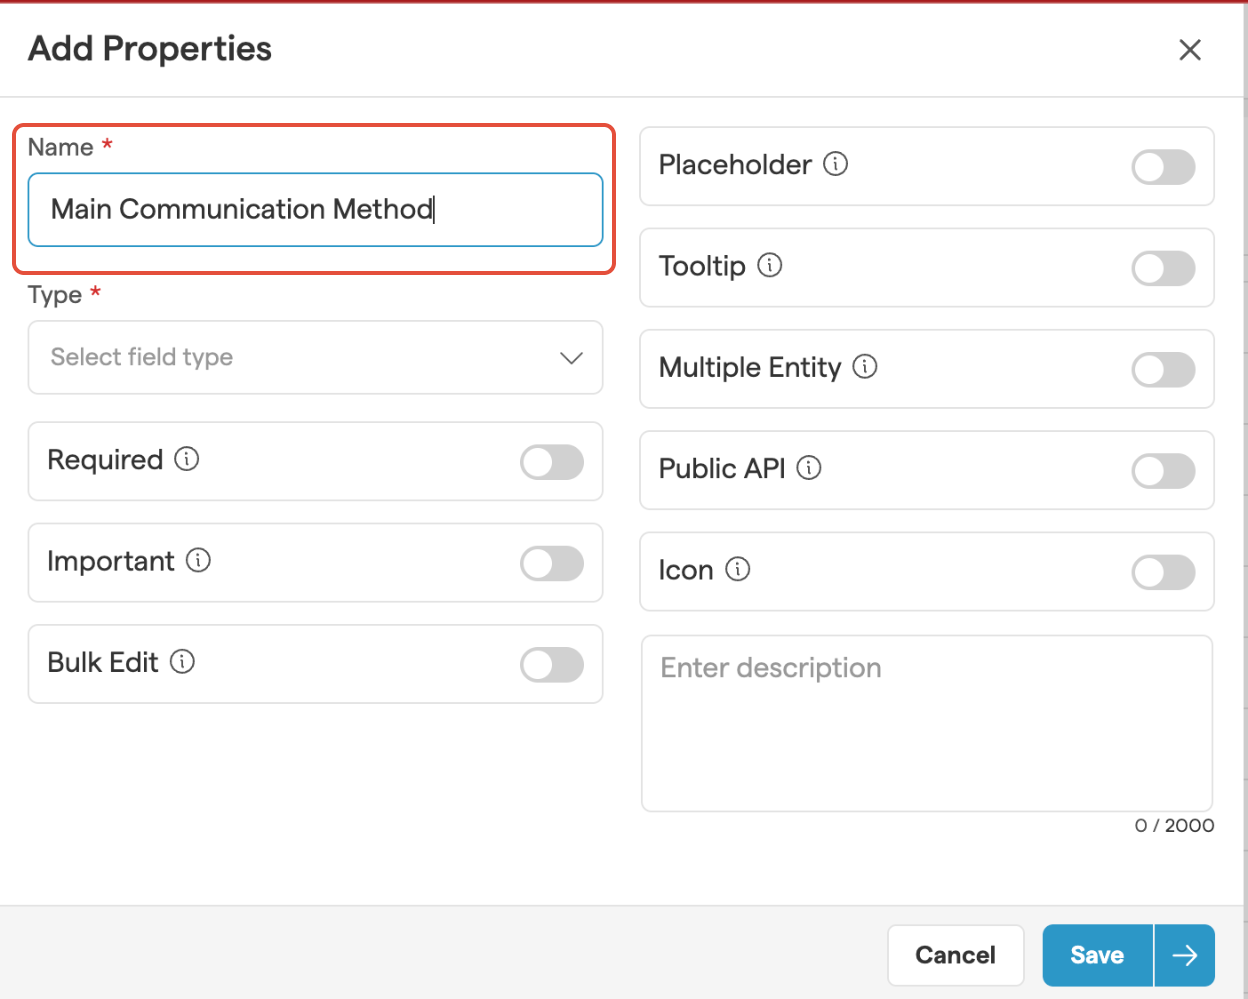
"Save"
Click "Save" and the new field will be added to your module.
How to Edit an Existing Field
If you need to make changes to an existing field:
Locate Field
Locate the field you want to edit. Follow the steps listed above under "Navigate to Field Settings".
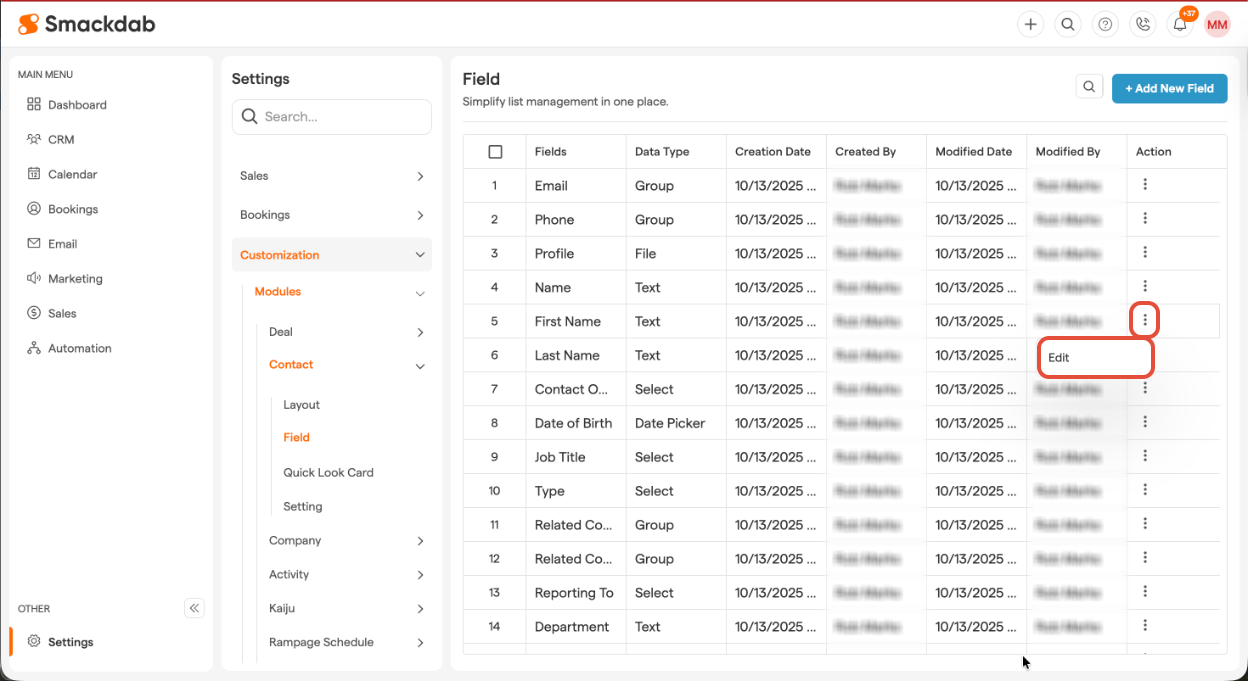
Select Edit
Click on the three-dot menu (⁝) next to the field in the "Action" column and select "Edit" to open the Edit Properties window.
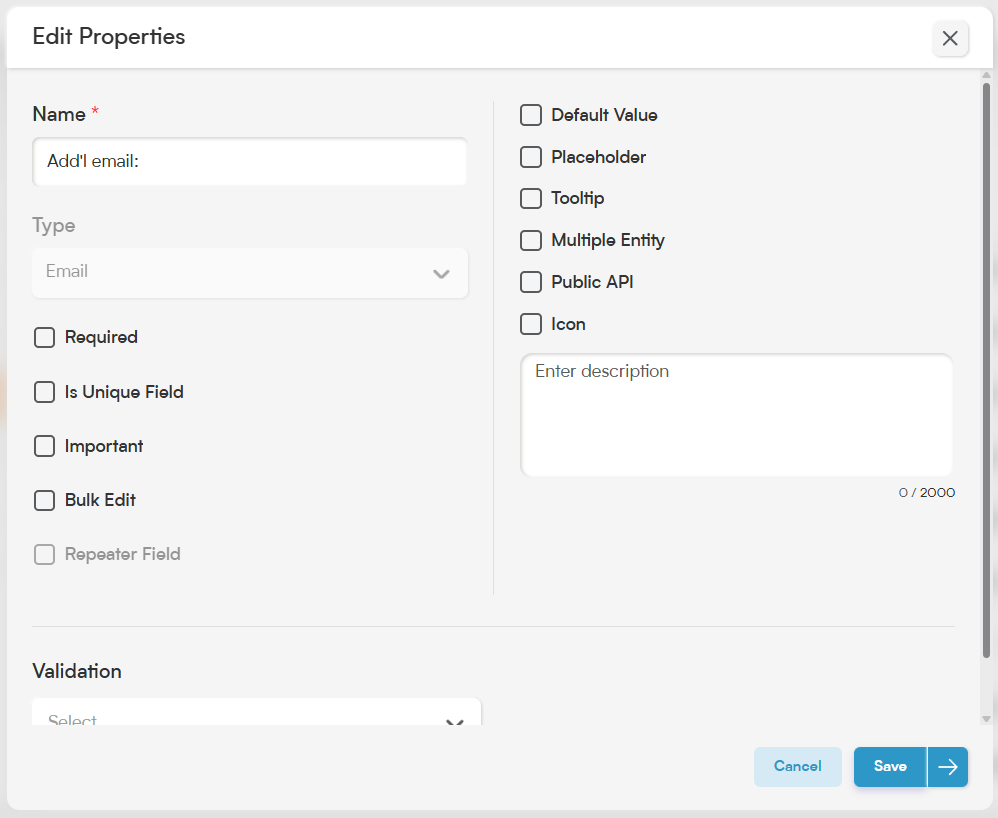
Edit Properties
Once you're in the Edit Properties window, you can modify or add new properties to fit your needs. When you are done, select "Save".
Smackdab.ai provides a set of default fields to give you a solid starting point.
These fields help you get up and running quickly while still allowing you the flexibility to customize and fine-tune them to match your workflow.
Field Name |
Description |
|---|---|
Field Name |
Change the label to something more relevant. |
Type |
Modify the data type if needed. |
Required |
Requires the field to be filled in before being submitted. |
Important |
Marks that this field is important information to know. |
Bulk Edit |
Allows the field to be updated across multiple entities simultaneously. |
Placeholder |
Add a hint to guide users. |
Tooltip |
Provide additional context or instructions. |
Multiple Entities |
Enable this field for multiple entities. |
Public API |
Make the field available via API if needed. |
Icon |
Assign an icon for better visual identification. |
Description |
Add a brief explanation of the field’s purpose. |
Customizing your field layouts in Smackdab ensures your CRM captures exactly the data you need, in the way that works best for you.
Whether you’re adding new fields or fine-tuning existing ones, these simple steps make it easy to keep your workflow efficient and well-organized.
Give it a try, and make Smackdab work exactly the way you want it to!