
Say goodbye to manual billing headaches! Recurring Payments in Smackdab puts your customer charges on autopilot. This fantastic feature is perfect for businesses offering subscriptions, installment plans, or ongoing services, letting you collect payments at regular intervals without lifting a finger.
Why You'll Love Recurring Payments:
Smooth & Simple Billing: Streamline your entire billing process, cut down on payment delays, and keep your customers happy with predictable, hassle-free payments.
Steady Cash Flow, Guaranteed: Enjoy consistent revenue as the system automatically handles transactions, ensuring you get paid on time, every time.
Smart Automation for Billing & Invoicing:
Smackdab takes care of the heavy lifting by automatically creating invoices and processing payments according to the billing cycles you set (like weekly, monthly, or yearly).
This means less manual work for you and your team, plus the peace of mind that comes with timely and accurate payments!
Creating a Recurring Payment is simple - start by navigating to Sales>Recurring Payments.
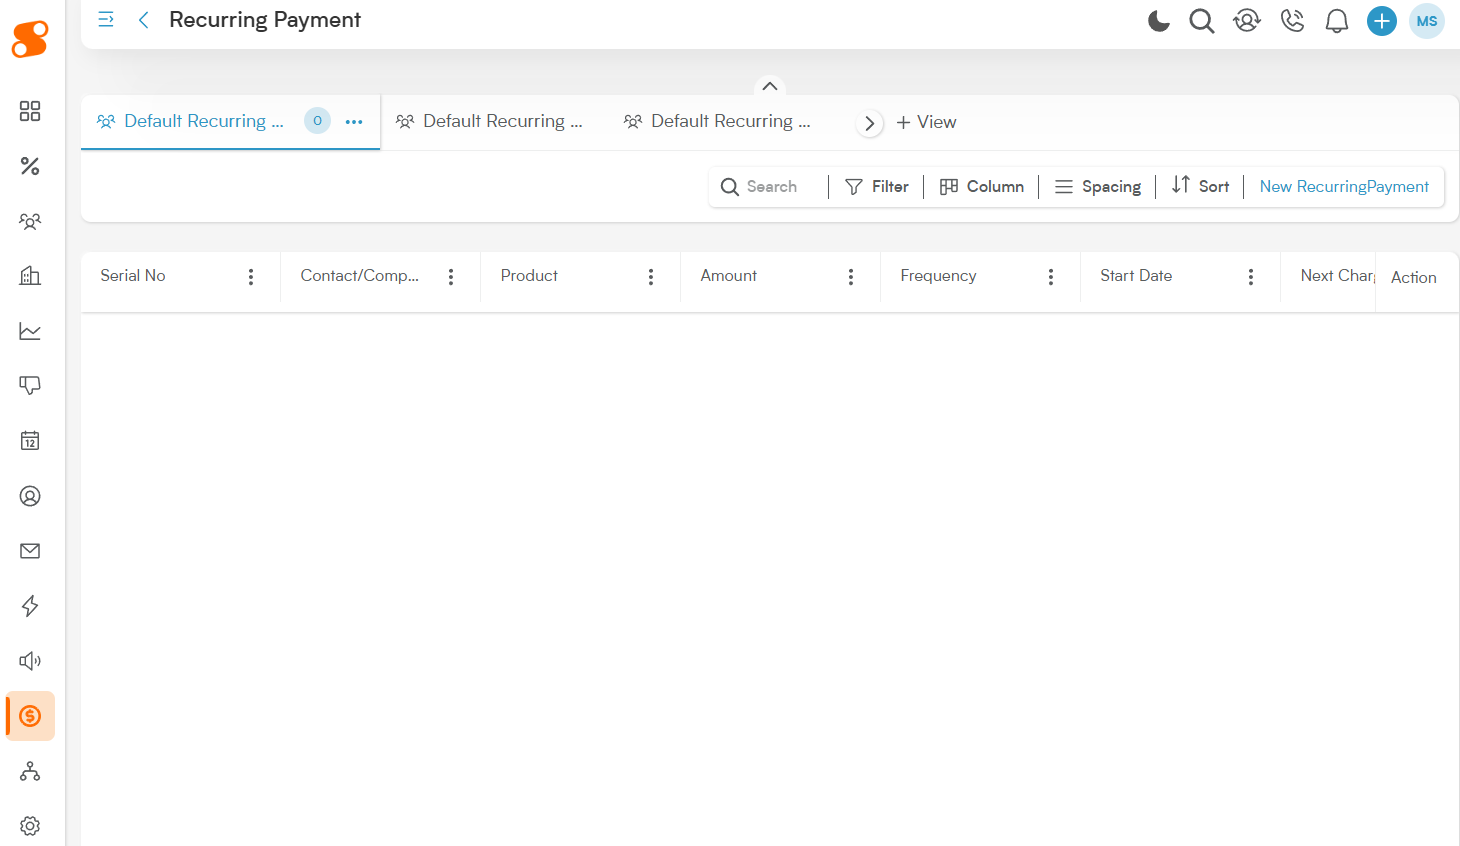
Click on the "New Recurring Payment" button in the top right. This will bring you to the Invoice Detail page for the Recurring Payment:
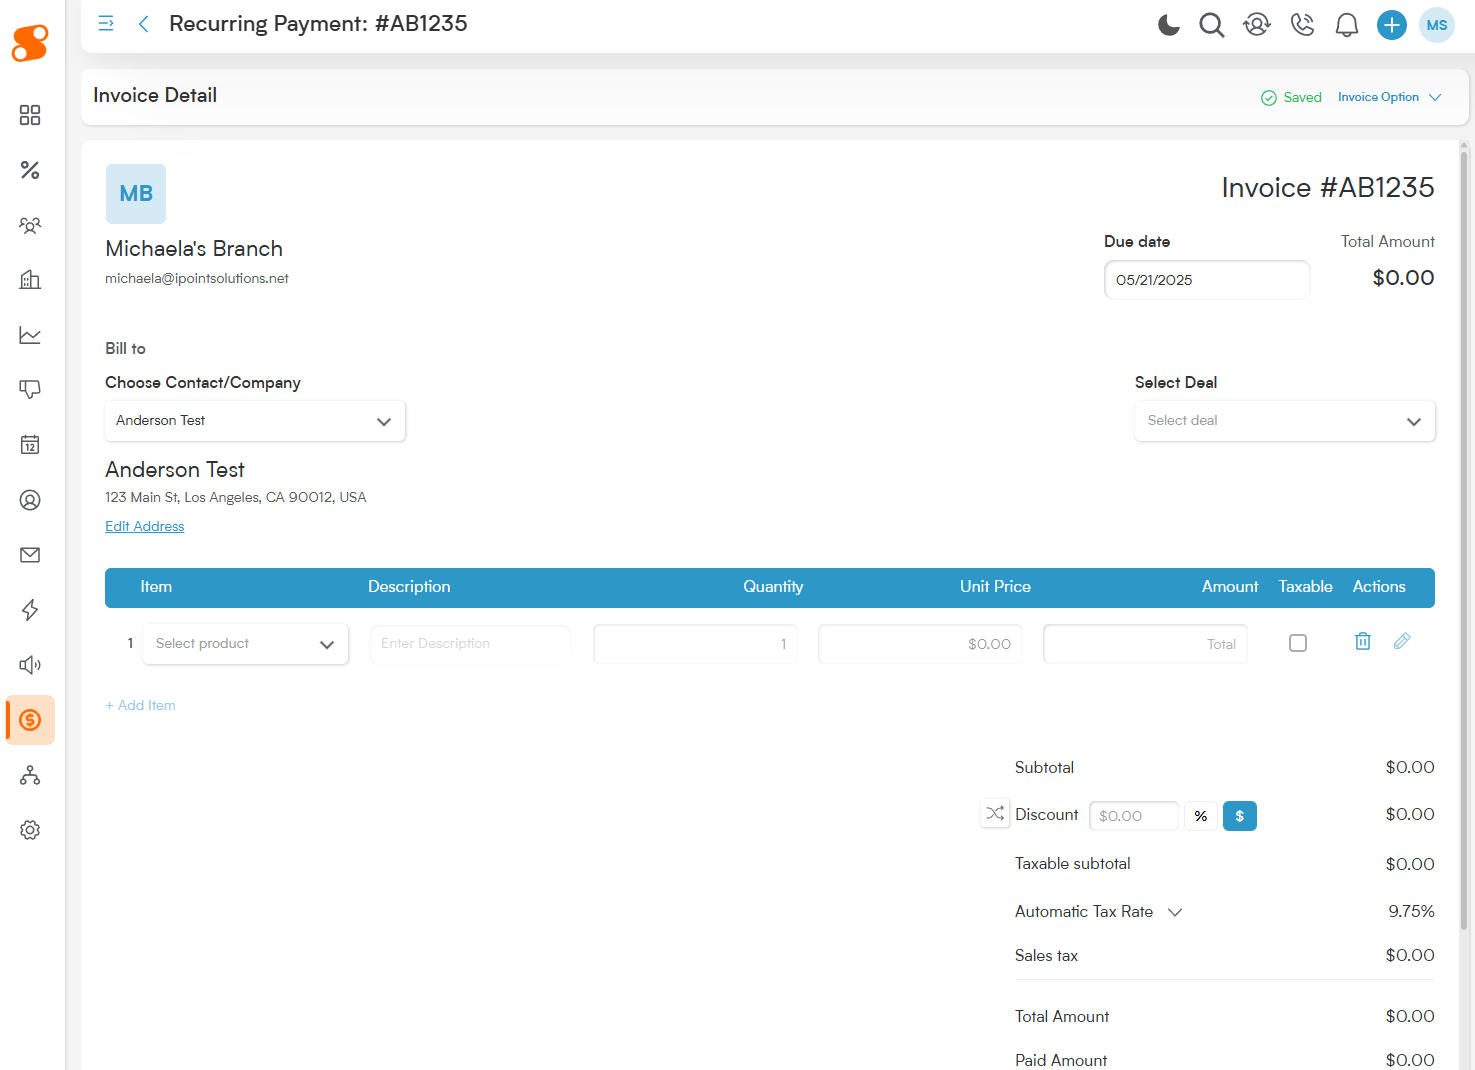
Recurring payments function off of an invoice, but are repeated based on the pattern of your choosing.
Bill to/Choose Contact/Company: This is where you'll select who you want to send this invoice to - either a customer or company in your contacts/company lists.
Invoice Number: After choosing your contact/company to bill to, you can change the invoice number by clicking on it! It will automatically change to an input box where you can change the number to anything you want!
Due Date: This will be the date you want to receive payment by.
Select Deal: If you have deals related to this contact, it will automatically be selectable in this drop down menu.
In the Item List area (under the blue bar), you have the ability to select Products to add to the invoice/recurring payment (please note: these products must be entered in Sales>Products before you will be able to select them to add to an invoice, quote, or recurring payment).
You can add additional items to the invoice by clicking "+Add Item". PLEASE NOTE: Each separate item has it's own recurring pattern, despite being on the same invoice! Make sure that after adding each additional item, you click on the Pencil icon to set the recurring pattern for that item.
Item: This is the name you gave the item when it was created.
Description: The description of the item when it was created - you can also customize this text on this invoice.
Quantity: The number of units of this product you want to sell.
Unit Price: The price of the item for your customer.
Amount: The sub-total of this line item.
Taxable: Check or un-check this box to mark it as taxable.
Once you select an item, the "Edit Invoice Item" window will appear, with the item automatically checked as a Recurring item.
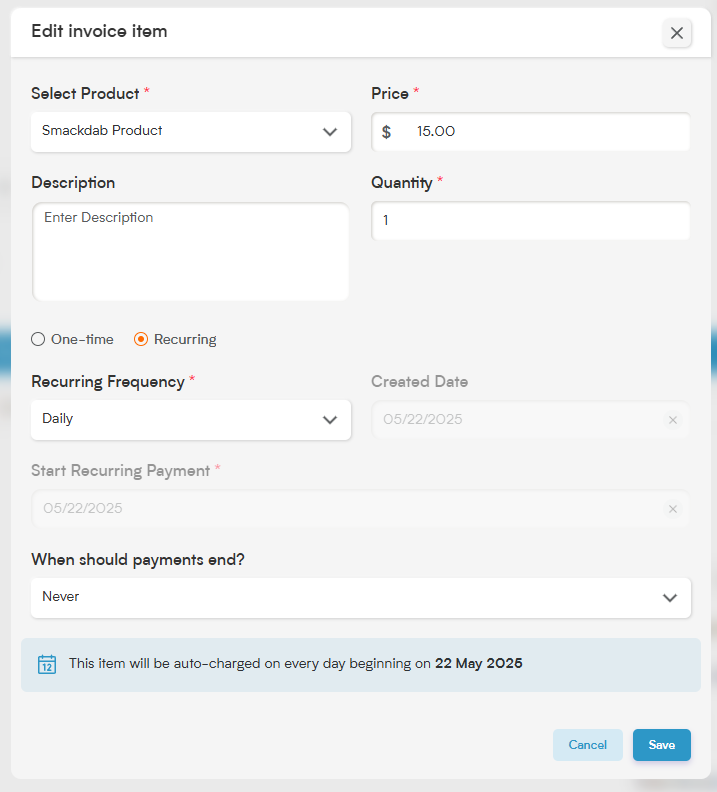
Recurring Frequency: This is where you will set the frequency of how often you want the item to be charged to the customer - Daily, Weekly, Monthly, Yearly, or a Custom timeline.
Created Date: This is the date you created the recurring payment pattern.
Start Recurring Payment: The date you want the first payment to be made.
When Should Payments End?: You have a few options here on when the recurring payments should end.
Never: Never have the recurring payments end until you manually turn them off.
After: After a certain amount of payments have been made.
On A Date: If there is a specific date you want the recurring payments to stop, select this option.
Discounts: You can easily add a discount line to any invoice. Plus, with a quick click of the shuffle icon, you get to choose exactly how it's applied. Decide whether the discount is taken off before taxes are calculated, or if it comes off the grand total after taxes have been included. This gives you precise control to apply savings in the way that works best for you and your customer.
Sales Tax: Here you can select the sales tax rate that you want applied to your customer's invoice. Just click the v arrow button next to Custom Sales Tax or Automatic Sales Tax on the invoice, and select the type of sales tax you want to use.
Automatic Sales Tax: This rate calculates sales tax automatically based on the zip code of the customer shown on the invoice.
Custom Sales Tax: Have a customer whose home is in a different zip code than their billing address? No problem! New custom sales tax rates can be added in Settings>Sales>Sales Tax.
Notes: Want to provide your customer with a specialized note about their work? Go ahead and spill your heart here.
Terms: A nice little Terms and Conditions area for your customer.
Attachments: Want to add images of the work done, a copy of the proposal, or a copy of their signed contract? Go ahead and add it right here!
Click on the "Next" button to be taken to the confirmation screen:
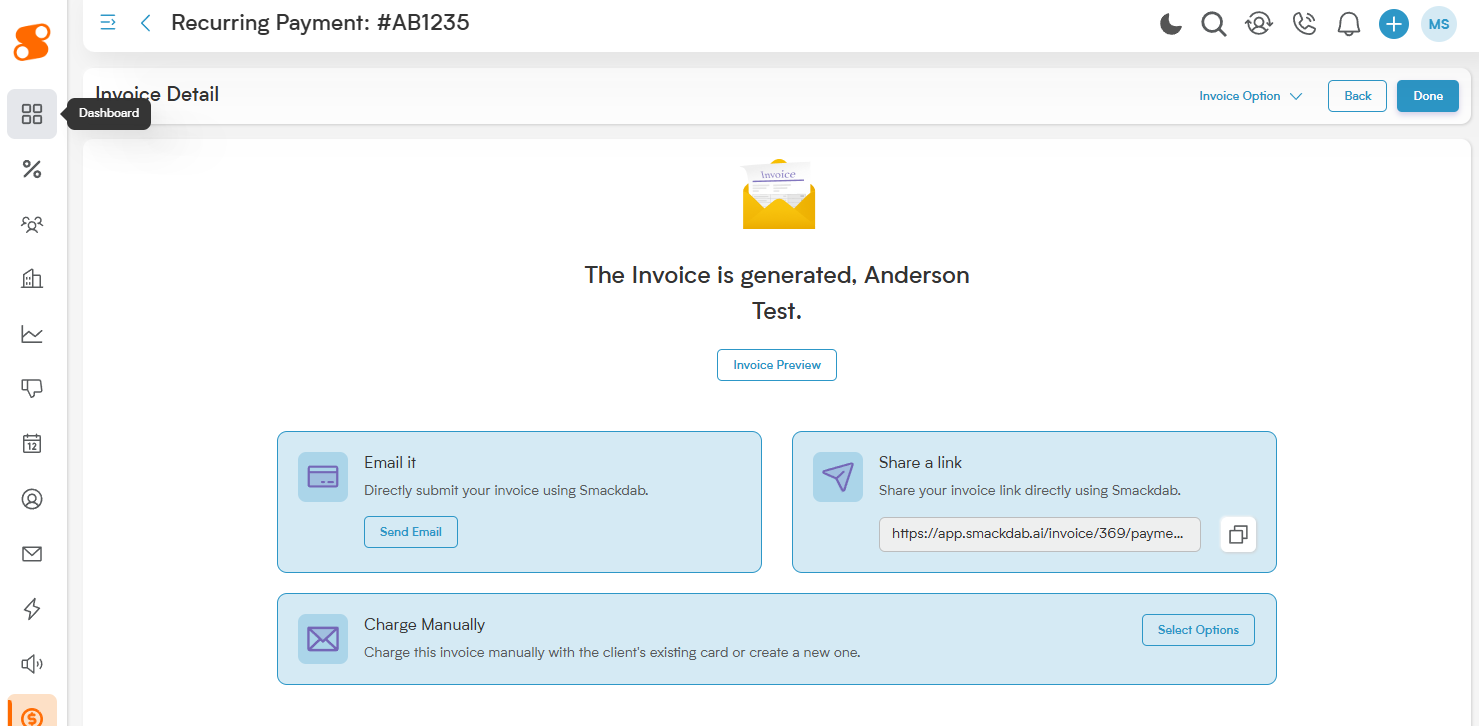
From here you can Email the invoice to your customer, share the link, or process a payment against the recurring invoice manually.