
Your Quick Action Buttons are a powerful part of the Quicklook Card — and the best part? You can fully control them.
Here’s everything you need to know:
How to Change Quick Action Button Position
Go to Quick Look Card Layout
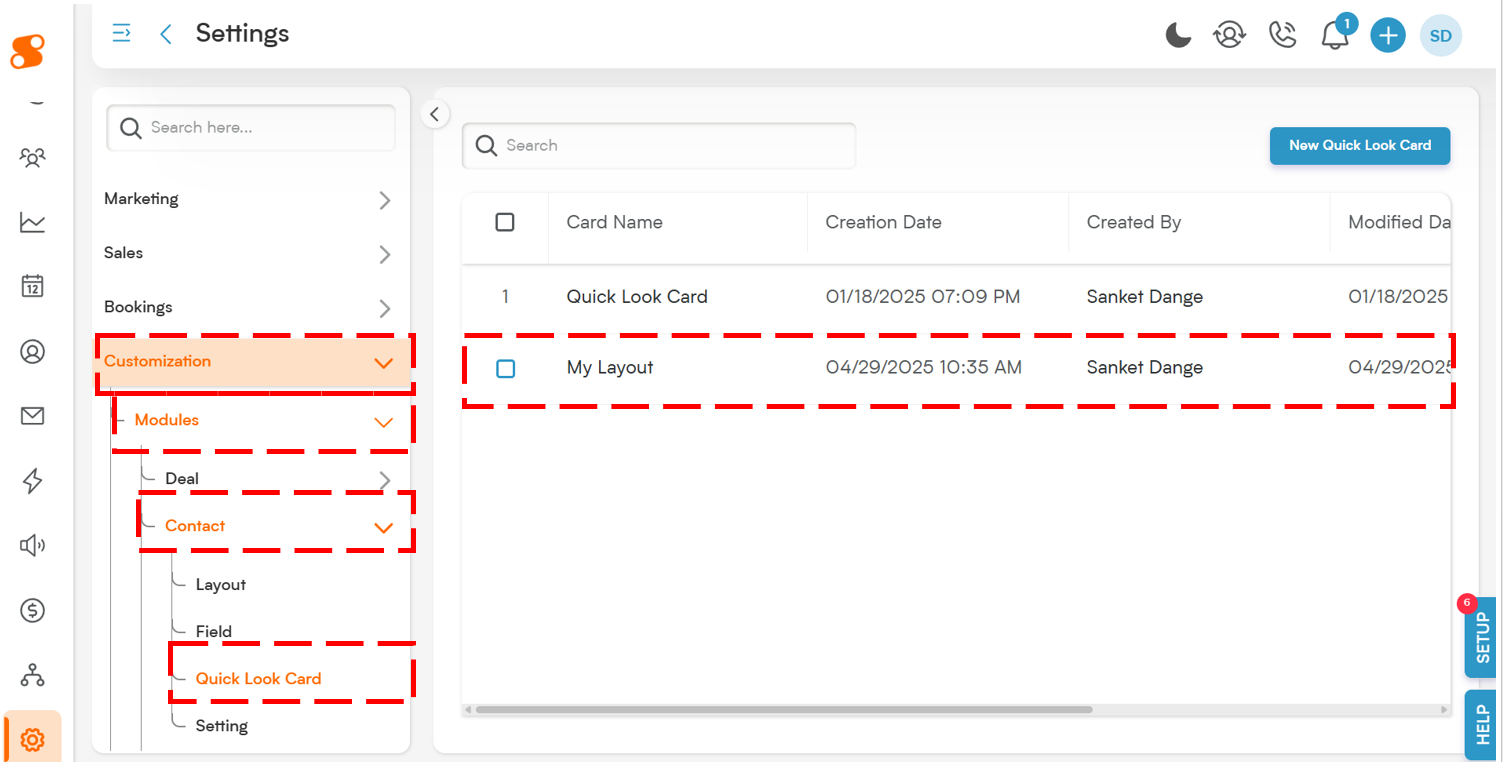
From the main menu on the left side of your screen, select "Settings". In the Settings window, select "Customization", then select "Modules". Select which module (i.e. Deals, Contacts, Companies) has the quick look card you are updating. From there, select "Quick Look Card".
Below, someone is modifying a Quick Look Card in the contacts module.
Select the Quick Look Card Layout you want to modify.
Find the Quick Action Buttons Section
Scroll to the bottom of your Quick Look Card layout.
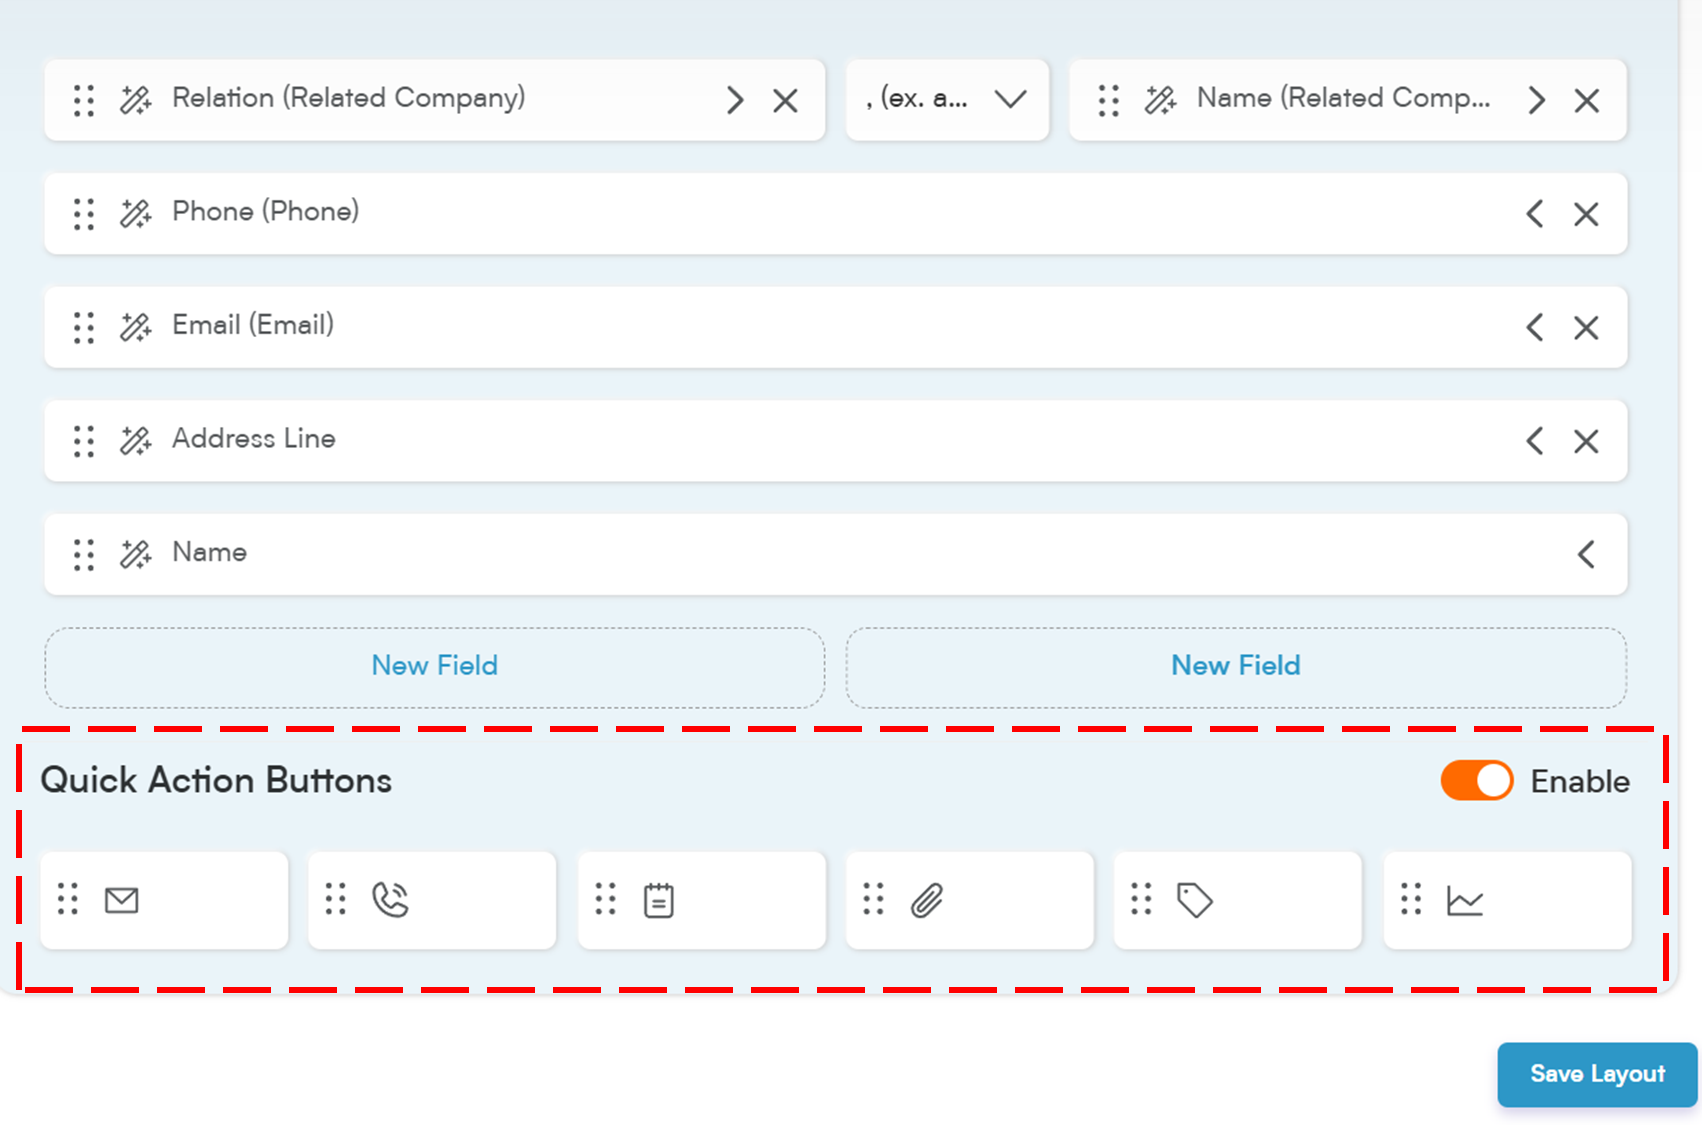
Drag and Drop Buttons
Want to prioritize calling over emailing? Just click and drag the button into your preferred order.
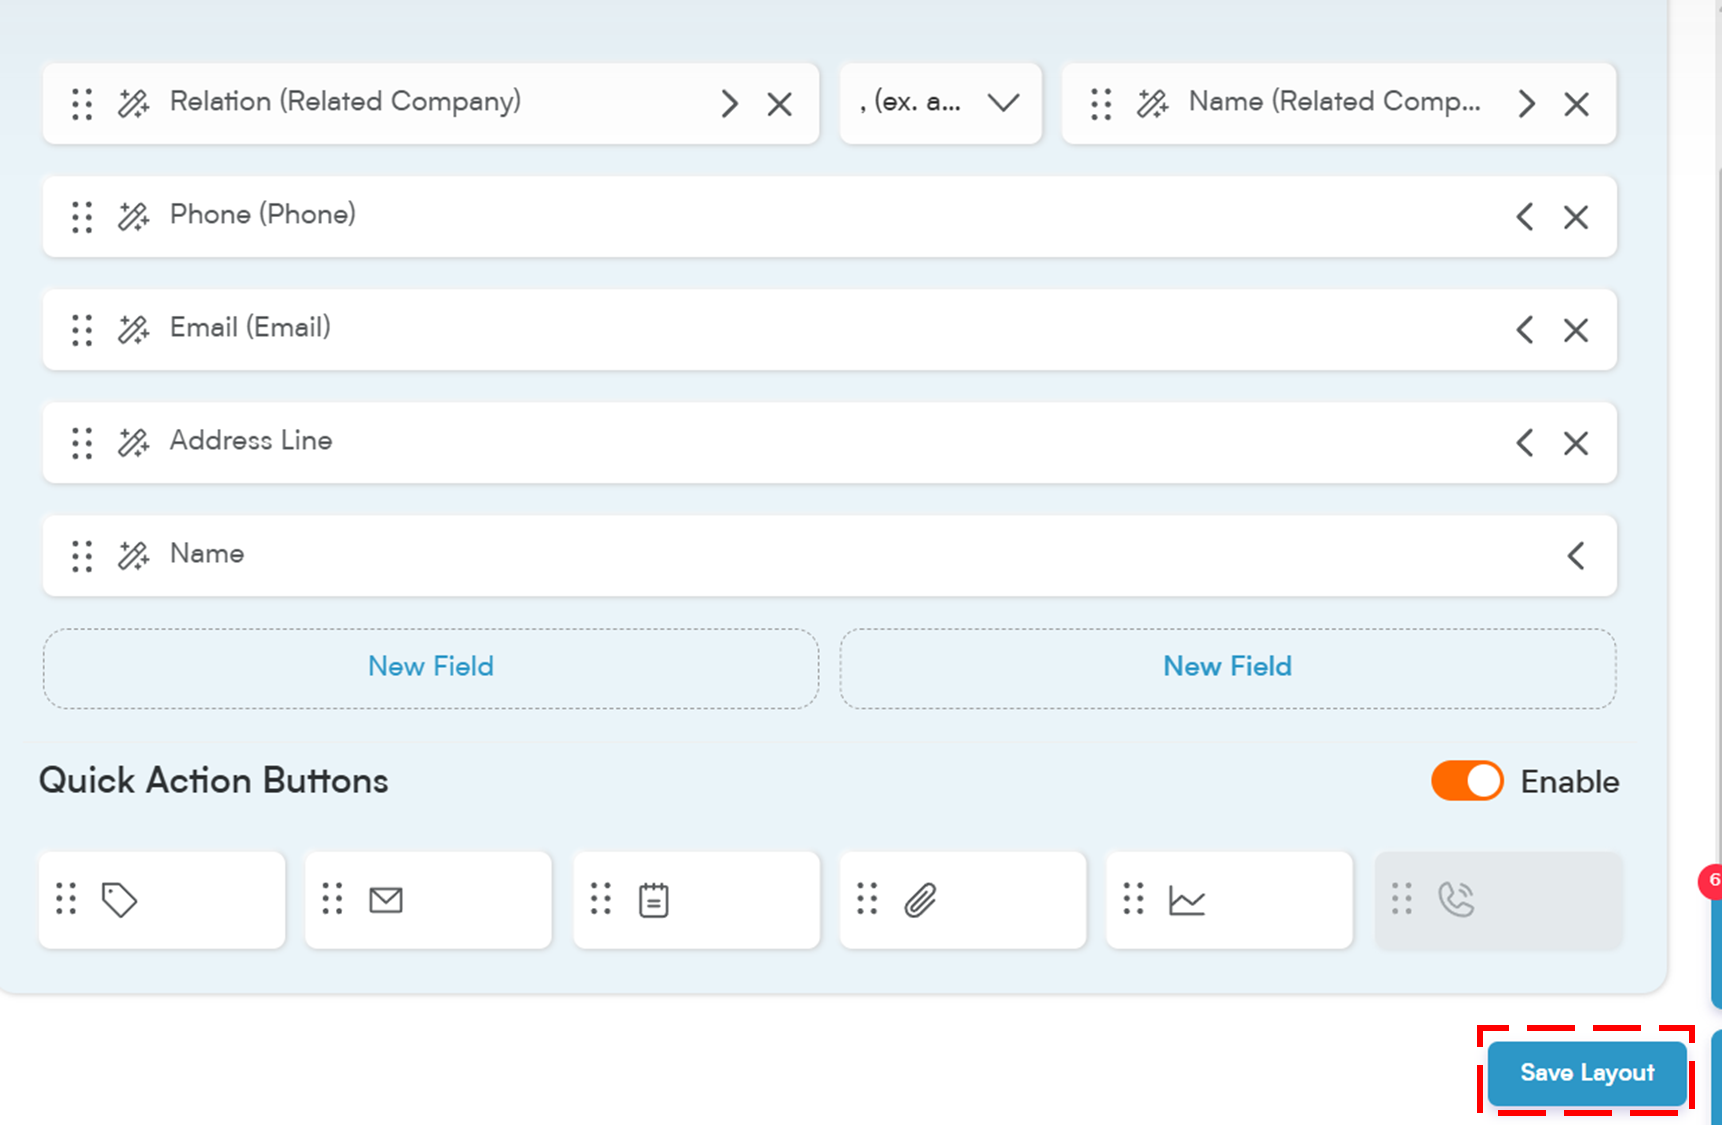
Save Layout
After rearranging, click "Save Layout" to lock in your changes.
Enable or Disable Quick Action Buttons
Toggle All Buttons
On the right side of the Quick Action Buttons section, you’ll find an enable/disable switch to turn all action buttons on or off at once.

Enable/Disable Individual Buttons
Want to disable just one or two? Click directly on the individual buttons to toggle them.
Save Changes
Always remember to click "Save Layout" after making adjustments.
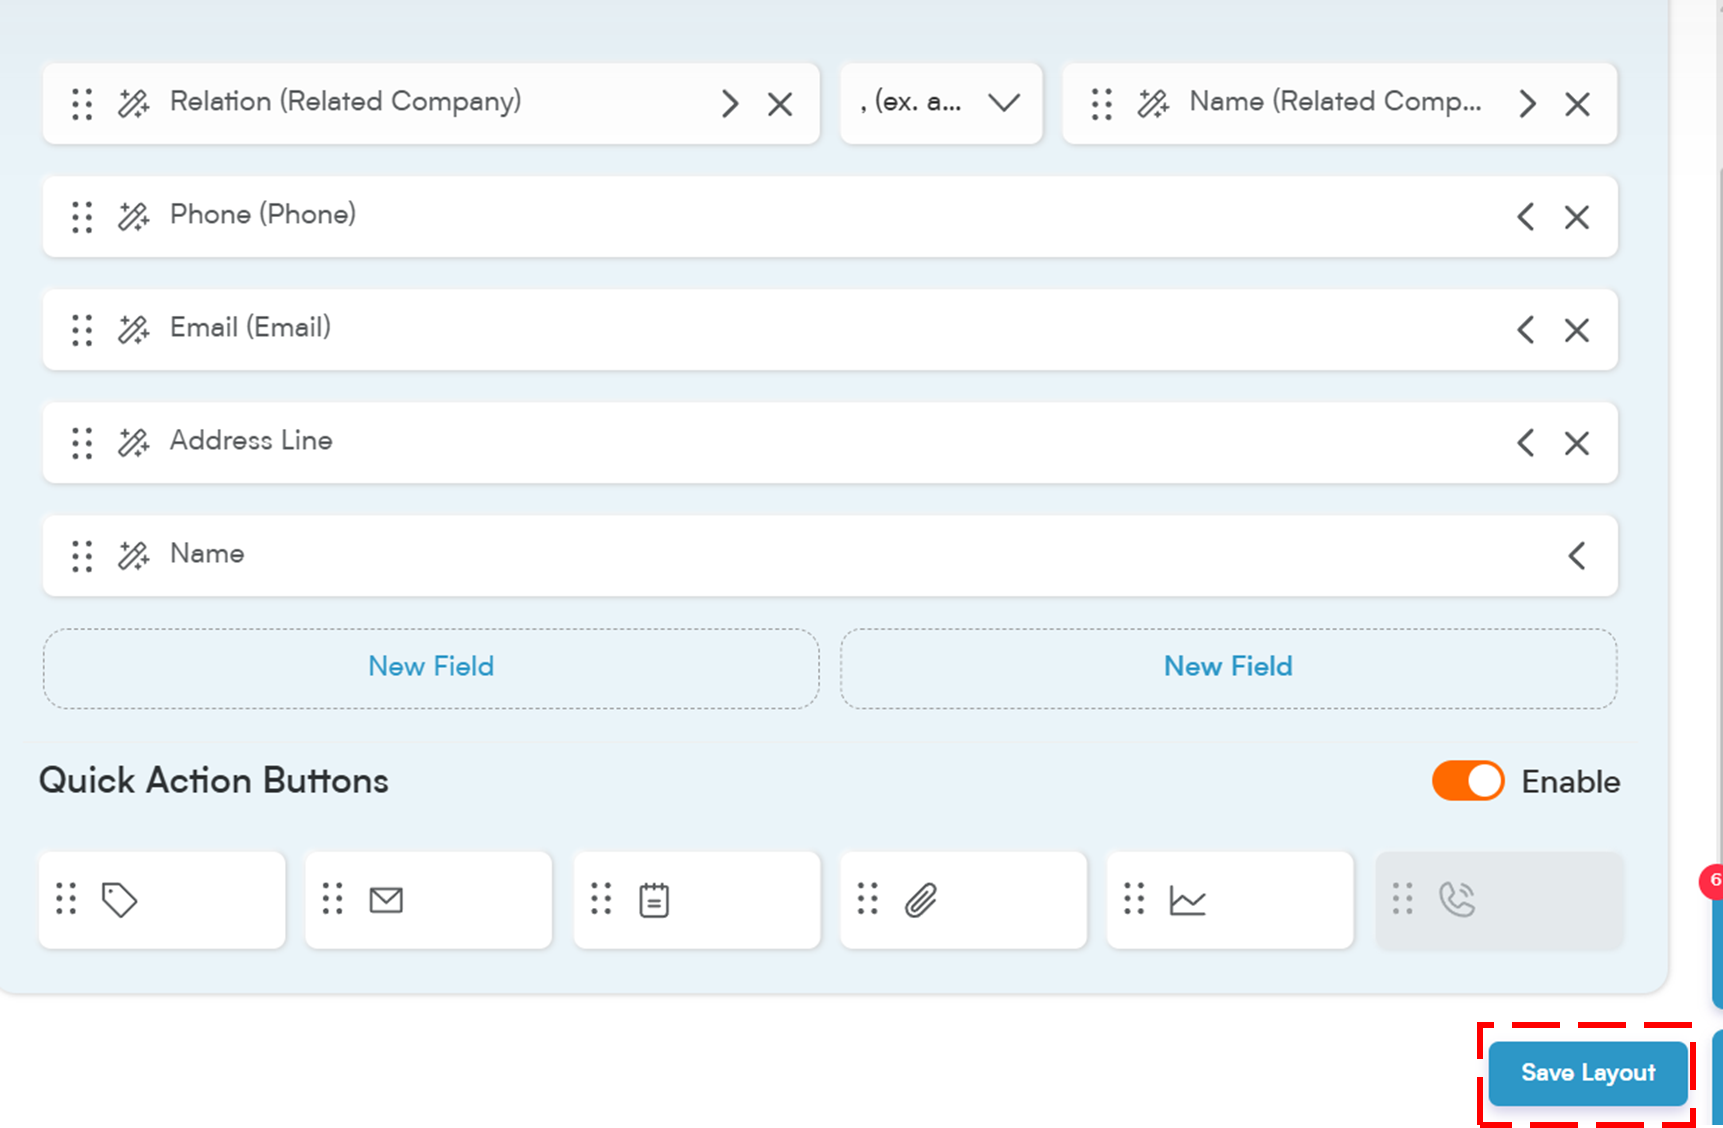
When disabled, your Quicklook Card will be clean and focused only on field data. When enabled, you’ll see all the action options at the bottom!
A well-organized set of action buttons can go a long way in making your workflow smoother and more efficient!
Check following article to know Where and How to Setup Quick look Cards