
Professional Communication Made Easy: Manage Your Email Signature in Smackdab!
An email signature is like your digital business card, a neat block of text, images, and contact details that automatically appears at the bottom of your email messages. It's an essential tool for professional communication, providing key information about you as the sender.
How to Add an Email Signature
Creating your professional signature in Smackdab is straightforward:
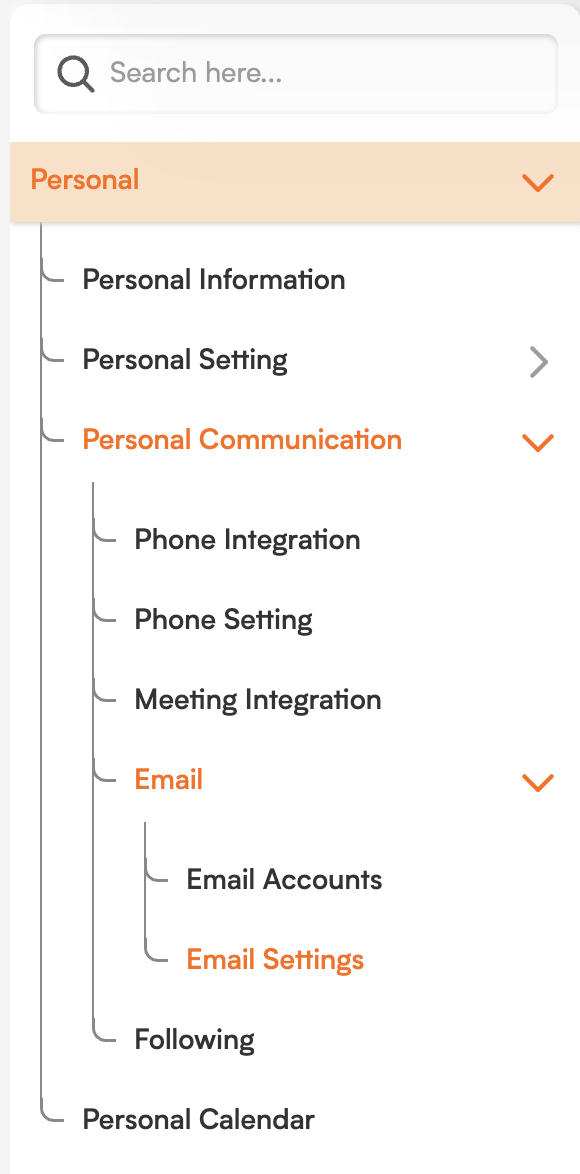
Go to Settings: From your main menu, click on Settings.
Access Personal: Under Settings, click on Personal.
Select Personal Communication: Under Personal, choose Personal Communication.
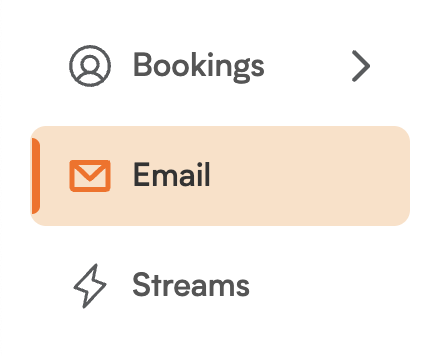
Click Email: In the Personal Communication section, click on Email.
-
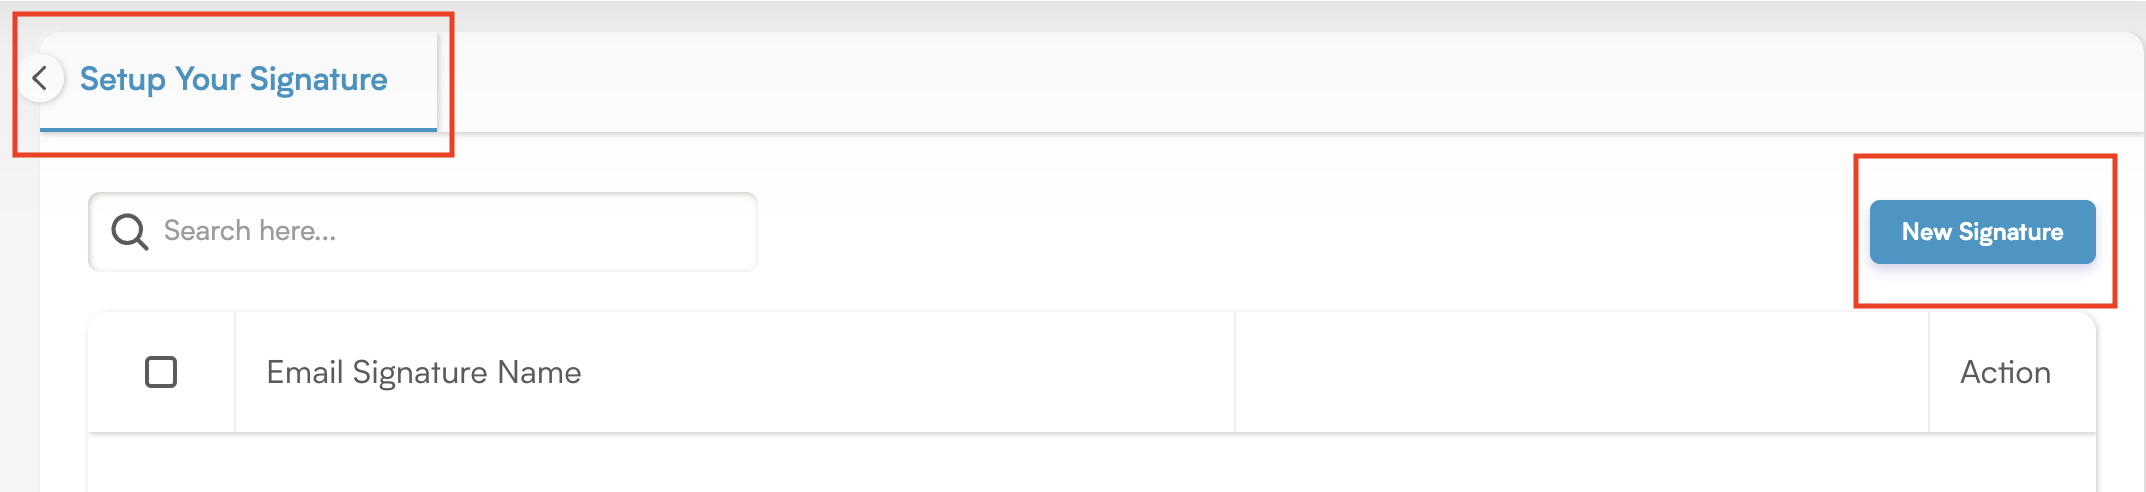
Go to Email Settings: Click on Email Settings.
Find "Setup Your Signature" Tab: On the Email Settings page, you will see the "Setup Your Signature" tab. Here, you'll find a list of any signatures you've already created.
-
Create a New Signature: To design a brand new email signature, click the New Signature button located at the top right.
-
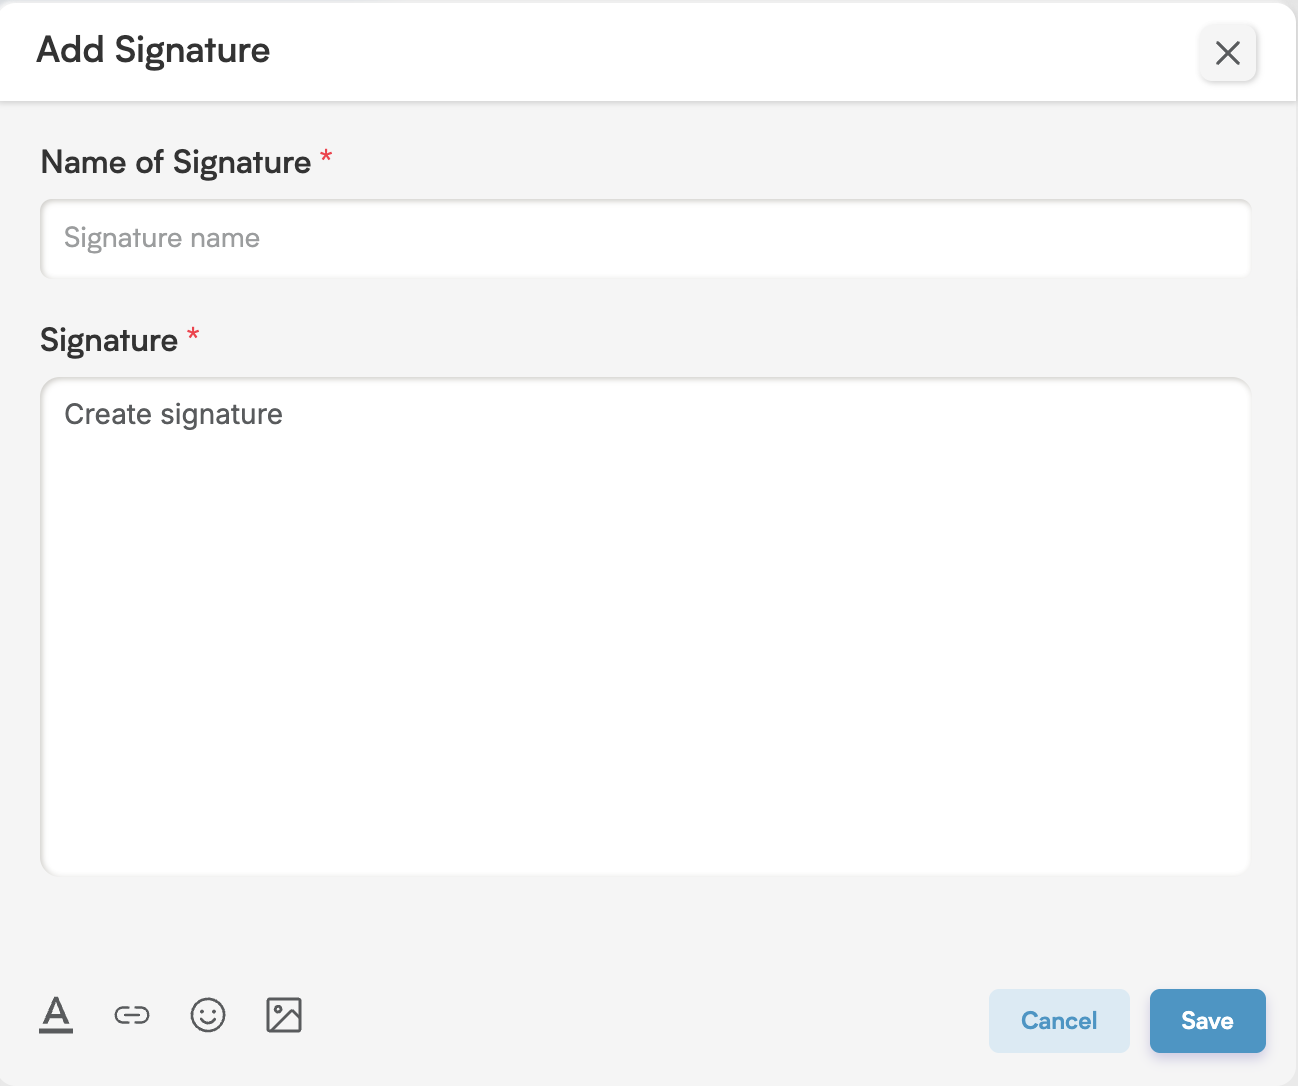
Add Signature Details: Clicking the New Signature button will open the "Add Signature" window.
Enter a clear and descriptive name for your signature in the Name of Signature field.
-
In the dedicated signature field, add all your desired details, such as your company name, job title, contact information, and anything else you wish to include.
To truly make your signature shine:
-
Format Your Signature: Double-click the text or click on the Toolbox icon to use the Rich Text Editor for precise formatting.
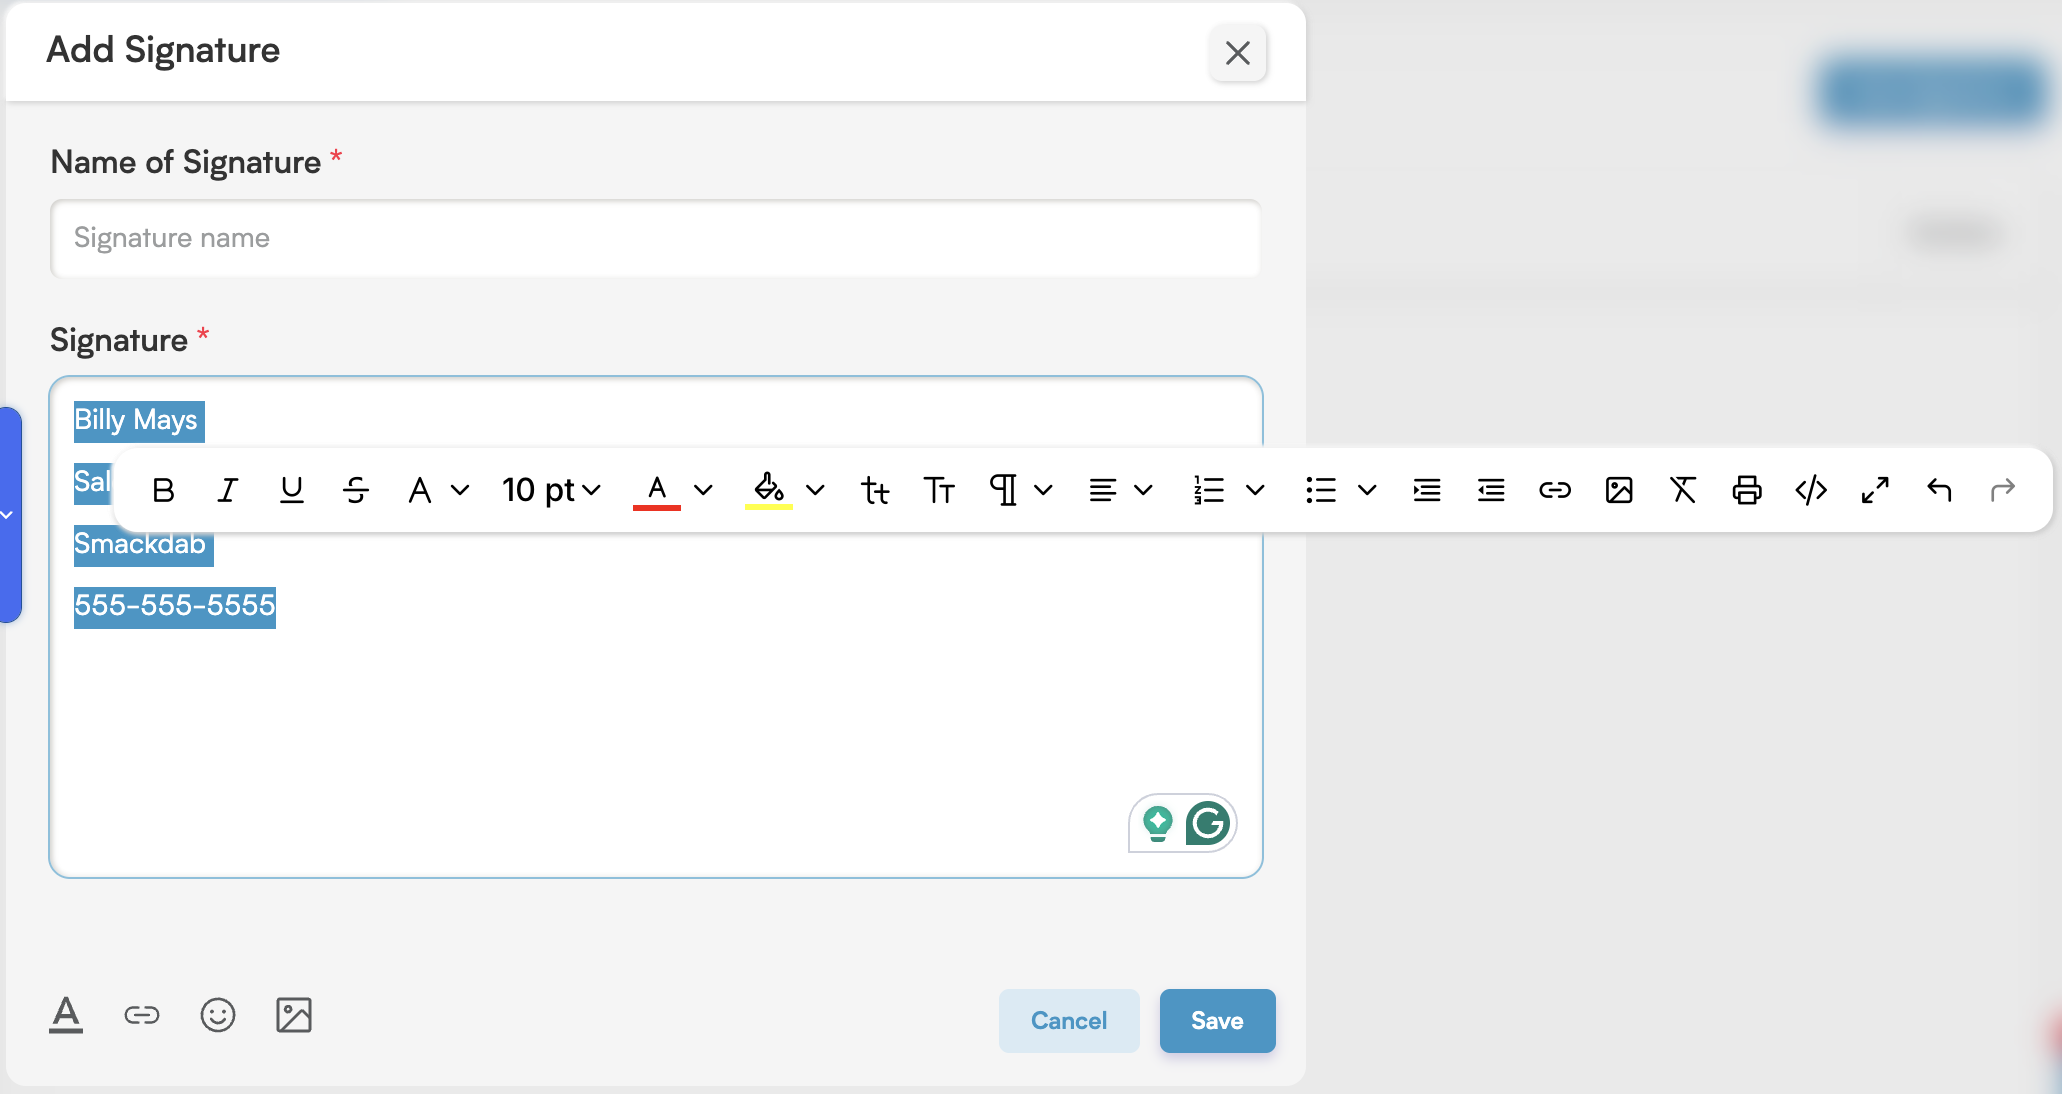
Enhance with Visuals: You can also add a link, an image, or even an emoji to your email signature by clicking the corresponding icons.
Add an Email Signature from the Email Compose Window
You can also easily add your signature while composing an email:
-
Go to the Email Module: Navigate to your email listing page.
-
Click New Compose: At the top right, click the New Compose button. This will open the email compose window.

-
Access Signatures: At the bottom of the window, you will see a Pen icon. Click this icon to view all your created signatures.
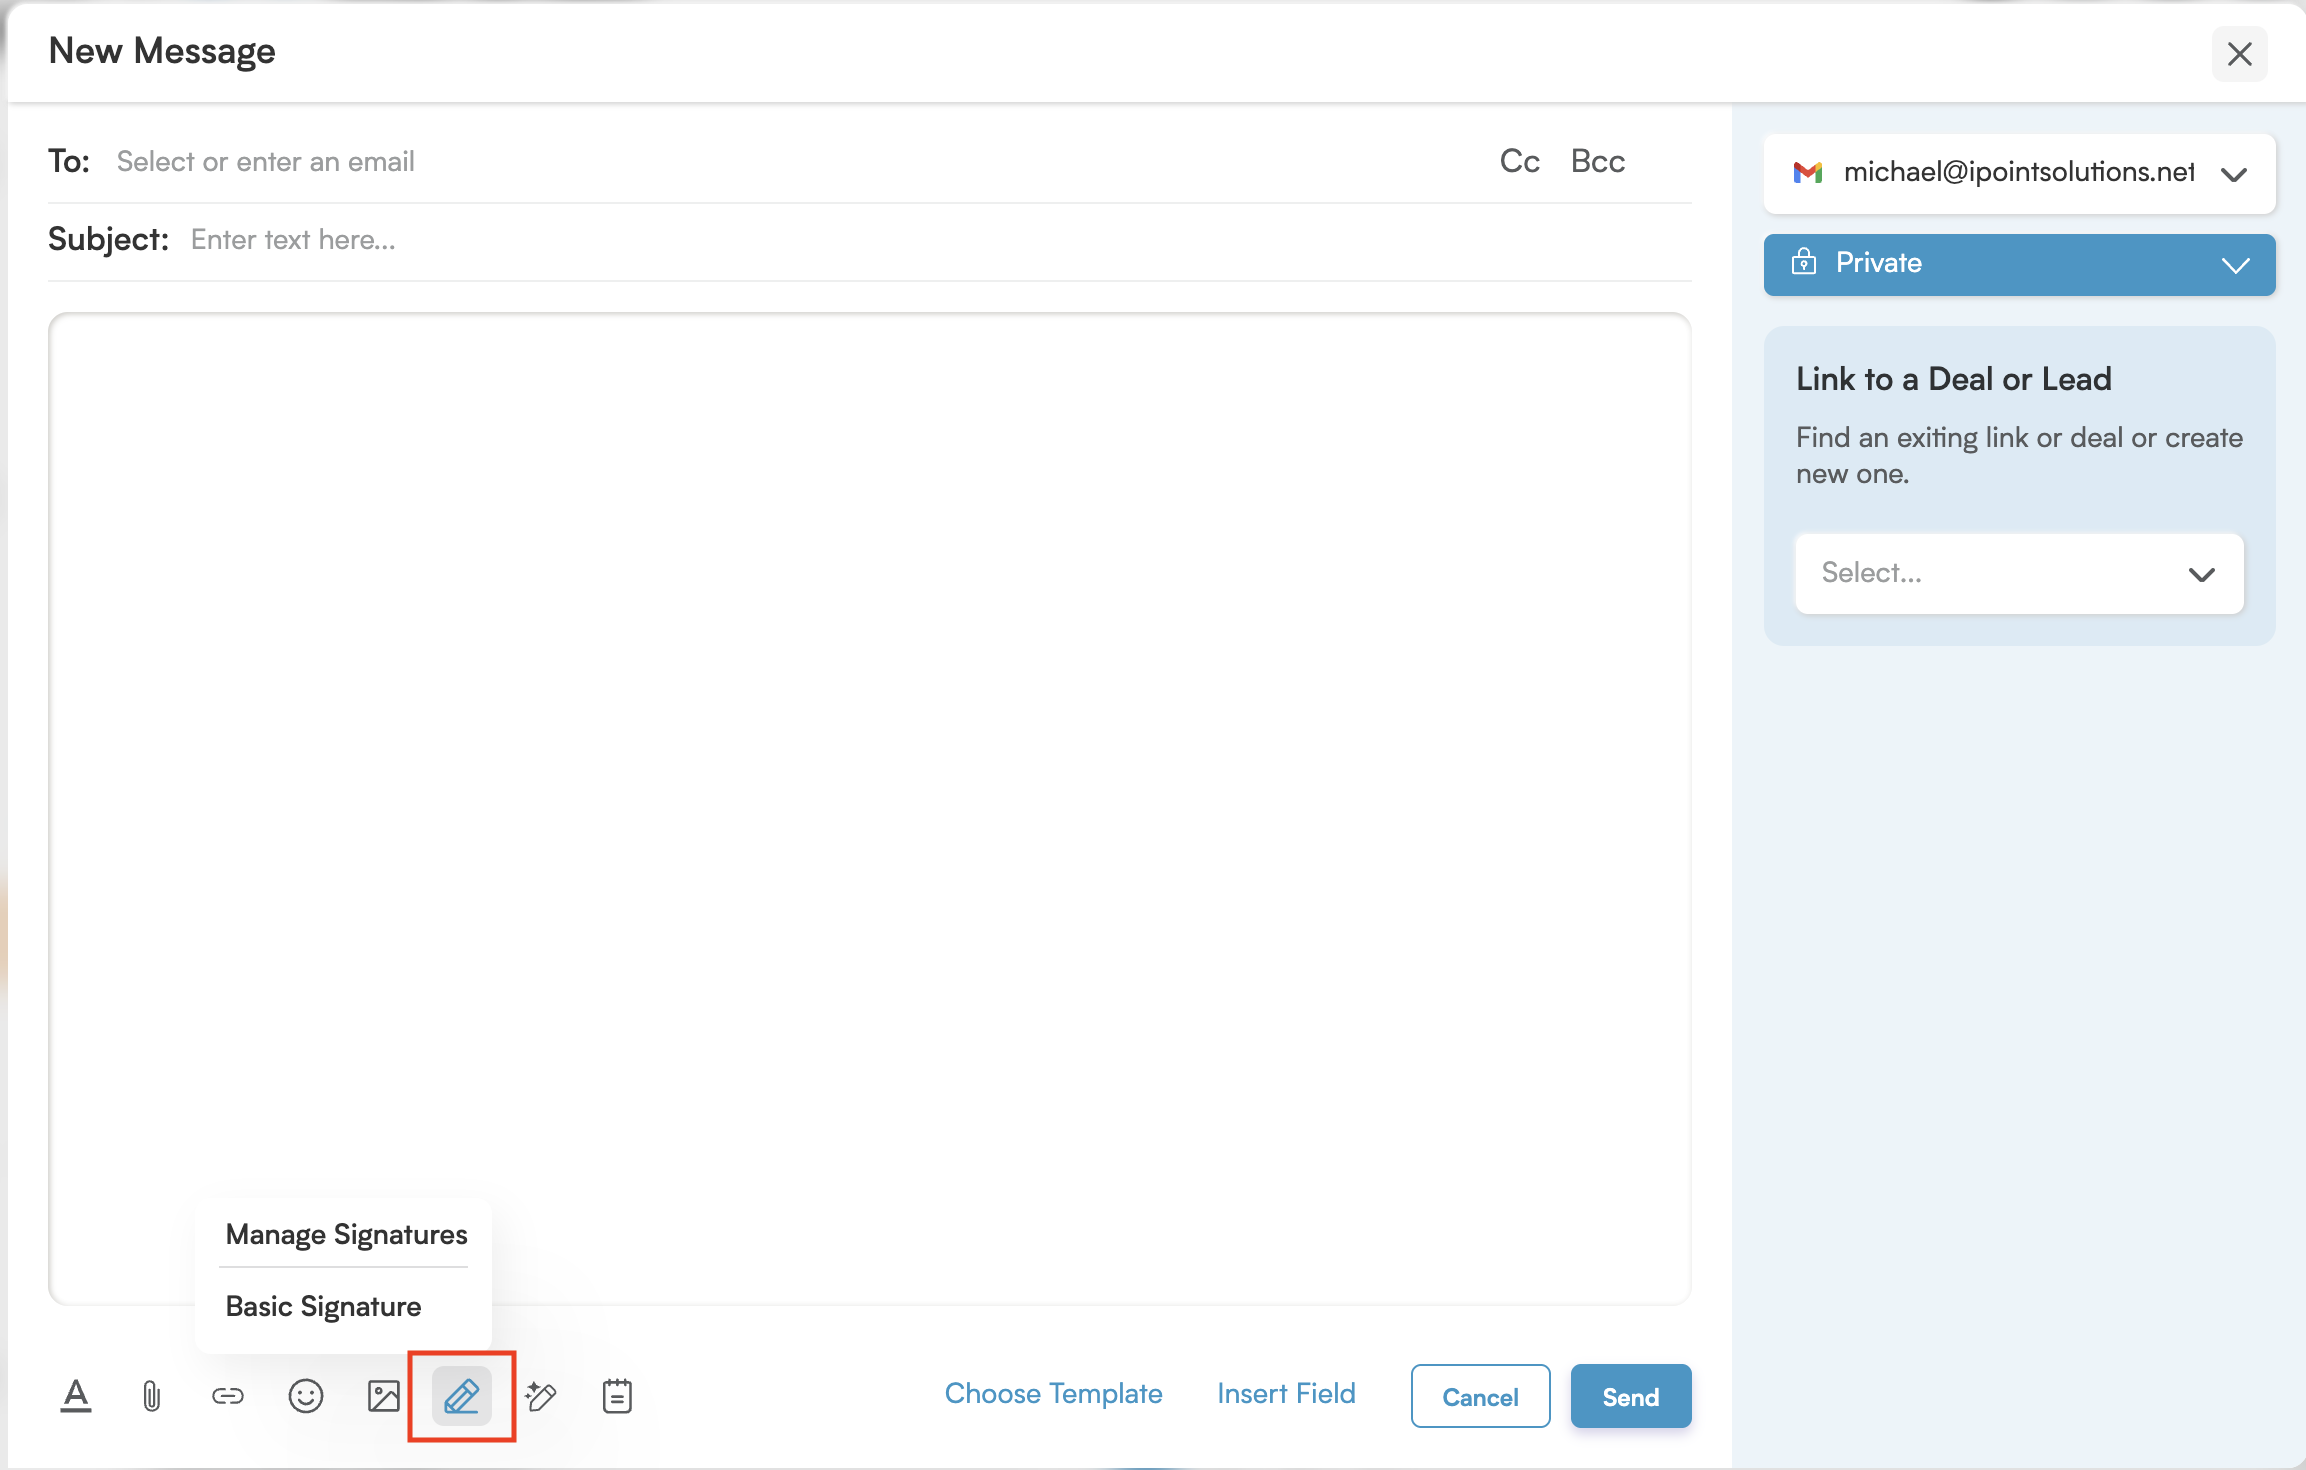
Select Your Signature: Choose the signature you want to add to your email from the list.
If you are replying to an email, forwarding a message, or working in draft mode, you can still add a signature by clicking the Pen icon.
To create a new signature directly from here, select the Manage Signatures option. This will redirect you to the "Setup Your Signature" screen.
How to Set a Default Signature
To ensure your preferred signature is automatically used, you can set a default:
Go to Settings: From your main menu, click on Settings.
Access Personal: Under Settings, click on Personal.
Select Personal Communication: Under Personal, choose Personal Communication.
Choose Email: In Personal Communication, select Email.
Click Email Accounts: Click on Email Accounts.
-
Find Signature Details: If you have an email account connected, you will see your email ID listed on the Email Accounts page. Click on Signature Details.
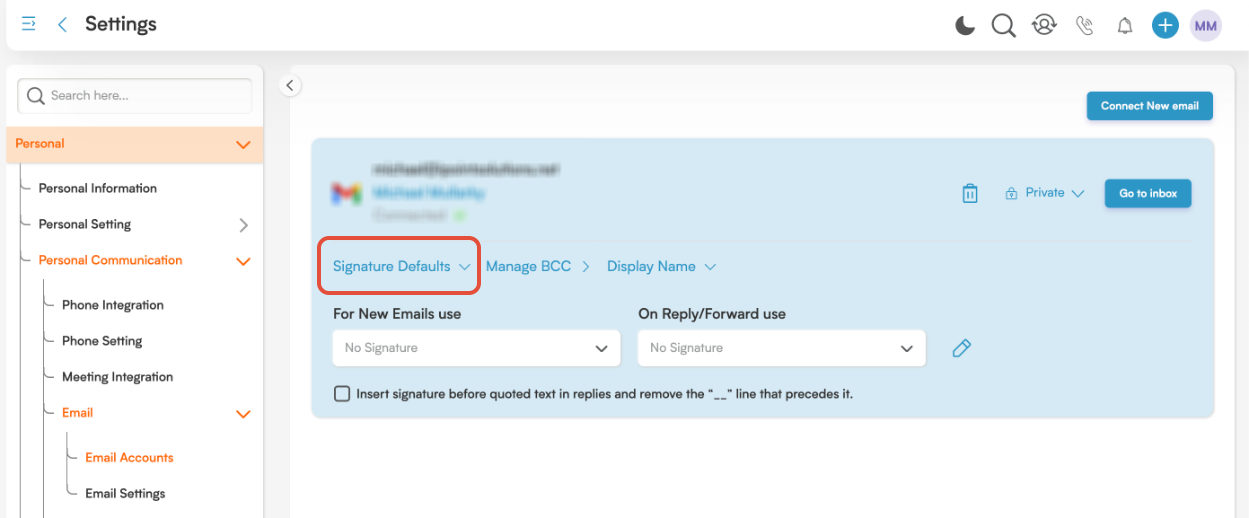
Set Your Preferences: You can set a signature according to your preference. Smackdab allows you to set different signatures for New Emails and for Reply/Forward Emails, giving you full flexibility.
To make quick edits to your signature, click the Pen icon next to the signature dropdown. Clicking this icon will open the "Setup Your Signature" window, where you can manage your signature details.