
Upload and Manage Your Data Using CSV Files
Smackdab allows you to easily import data using a CSV file. This is useful when you want to add new records or update existing ones in bulk without manual entry. The CSV import process is designed to be simple, guided, and flexible, so you can control exactly how your data is added or updated.
This guide walks you through the complete CSV import process - from uploading your file to finalizing your data.
Before You Start:
Make sure that:
You have permission to access Import Data in Smackdab.
Your data is saved in a CSV file format.
Column headers in your CSV clearly describe the data (for example: Name, Email, Phone).
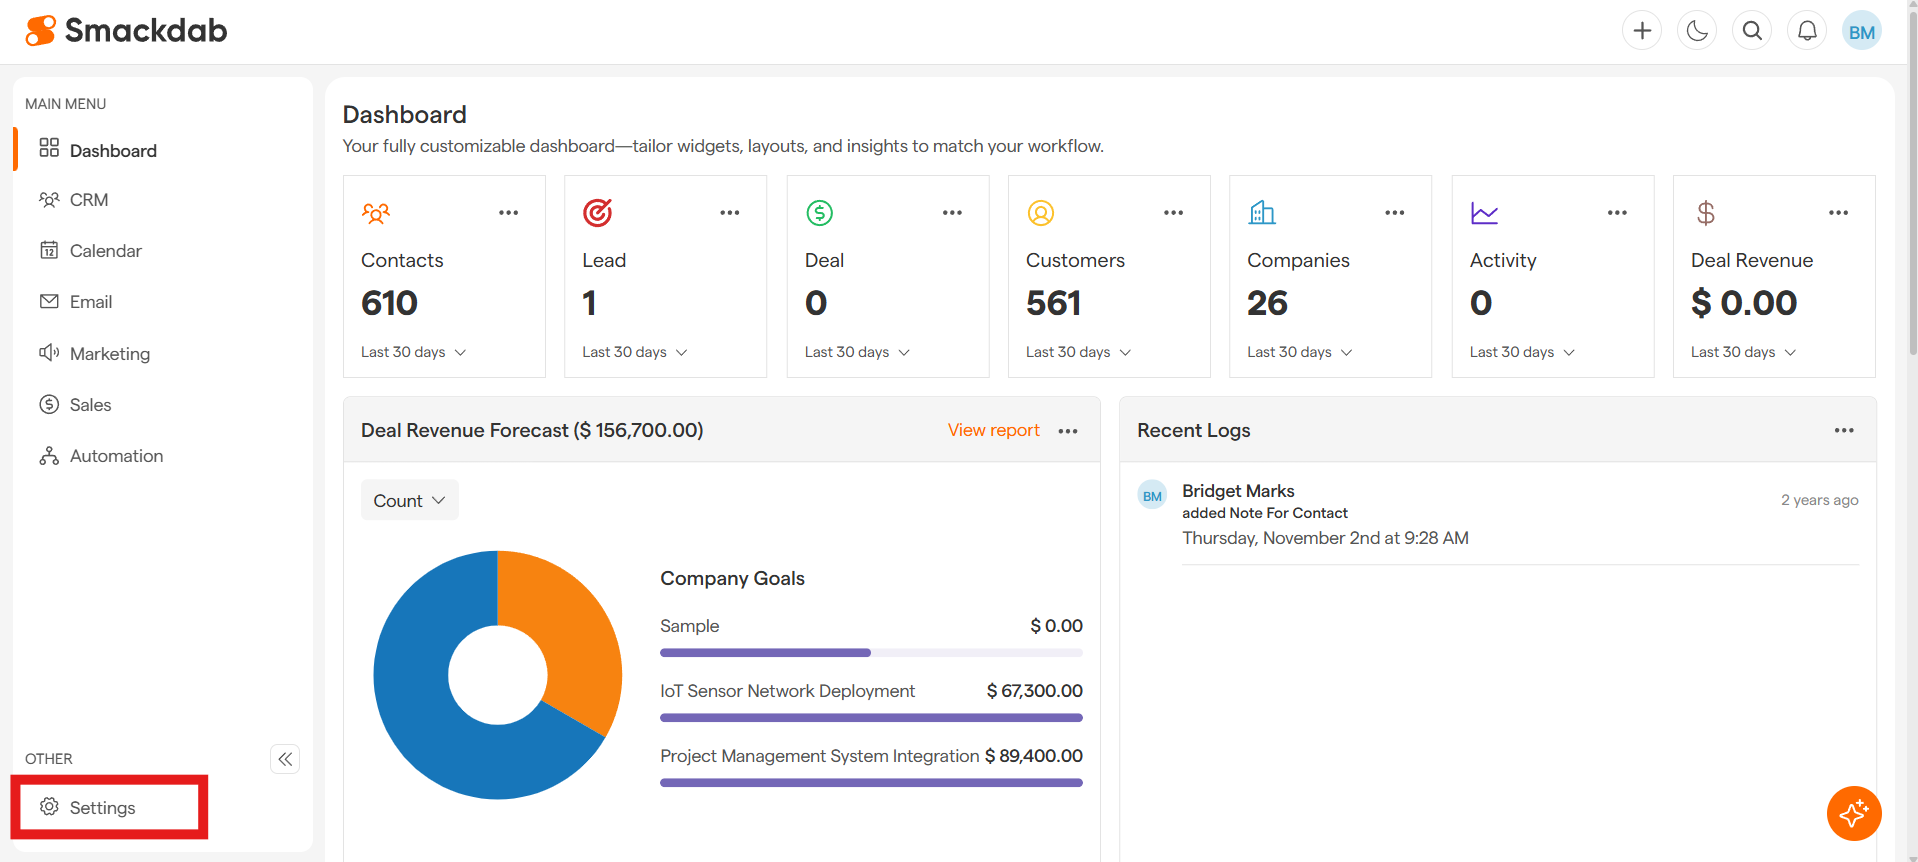
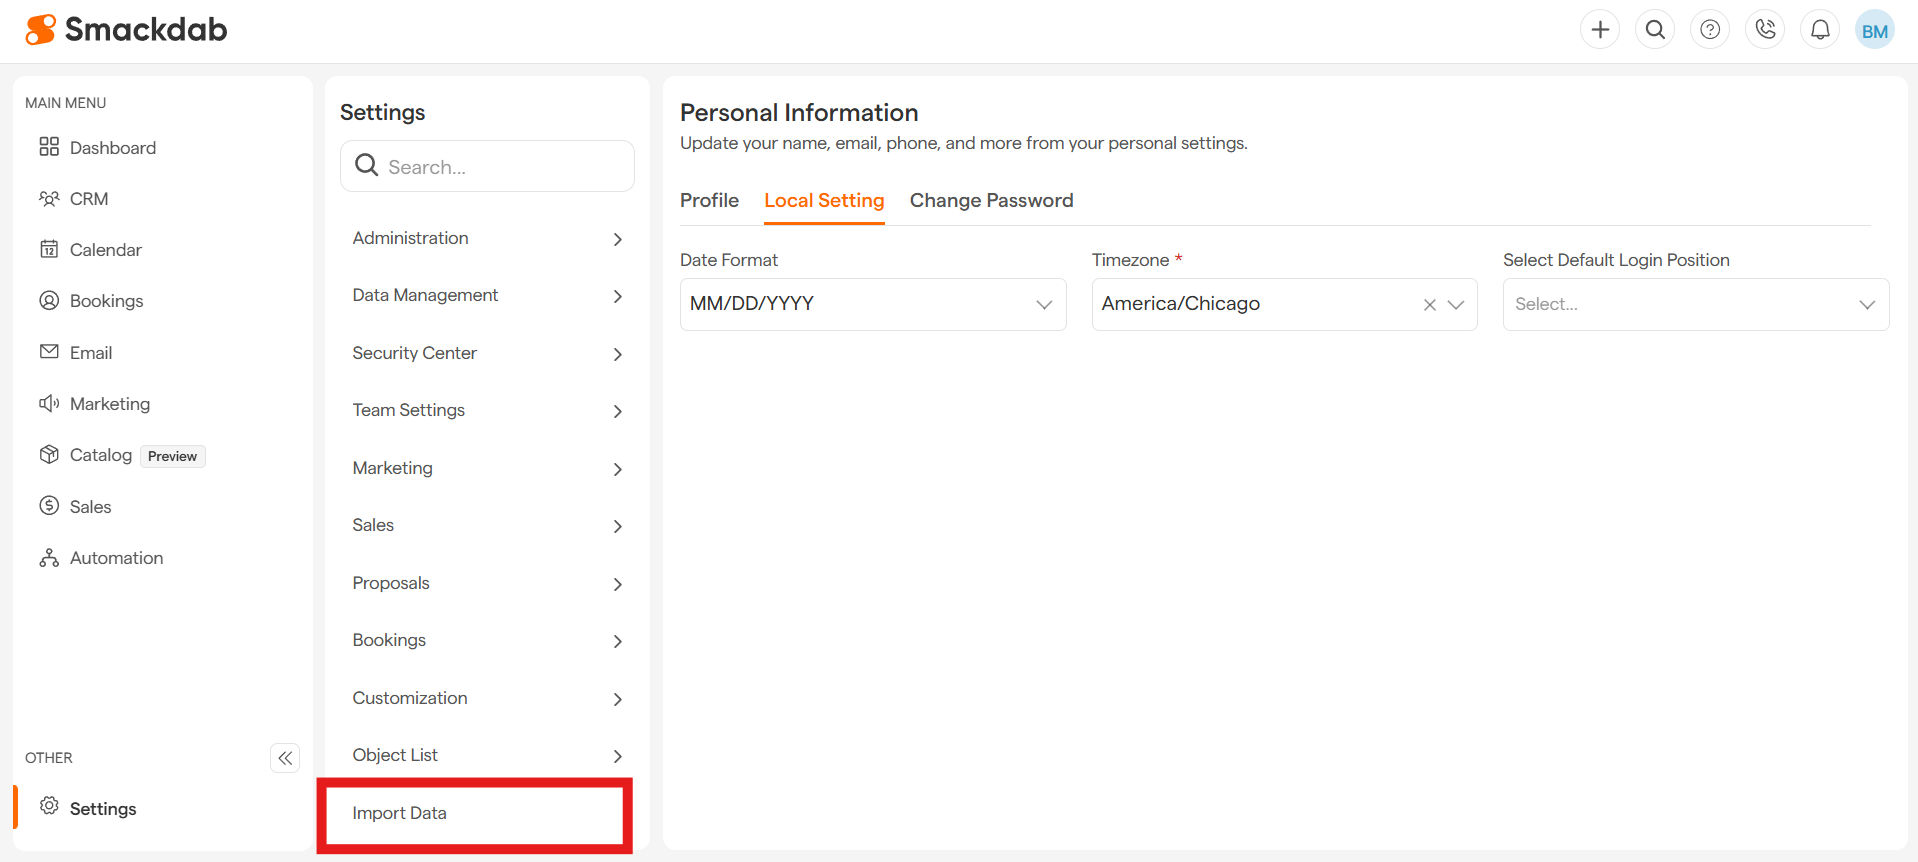
Step 1: Navigate to Import Data
-
Go to Settings
-
Select Import Data from the left menu.
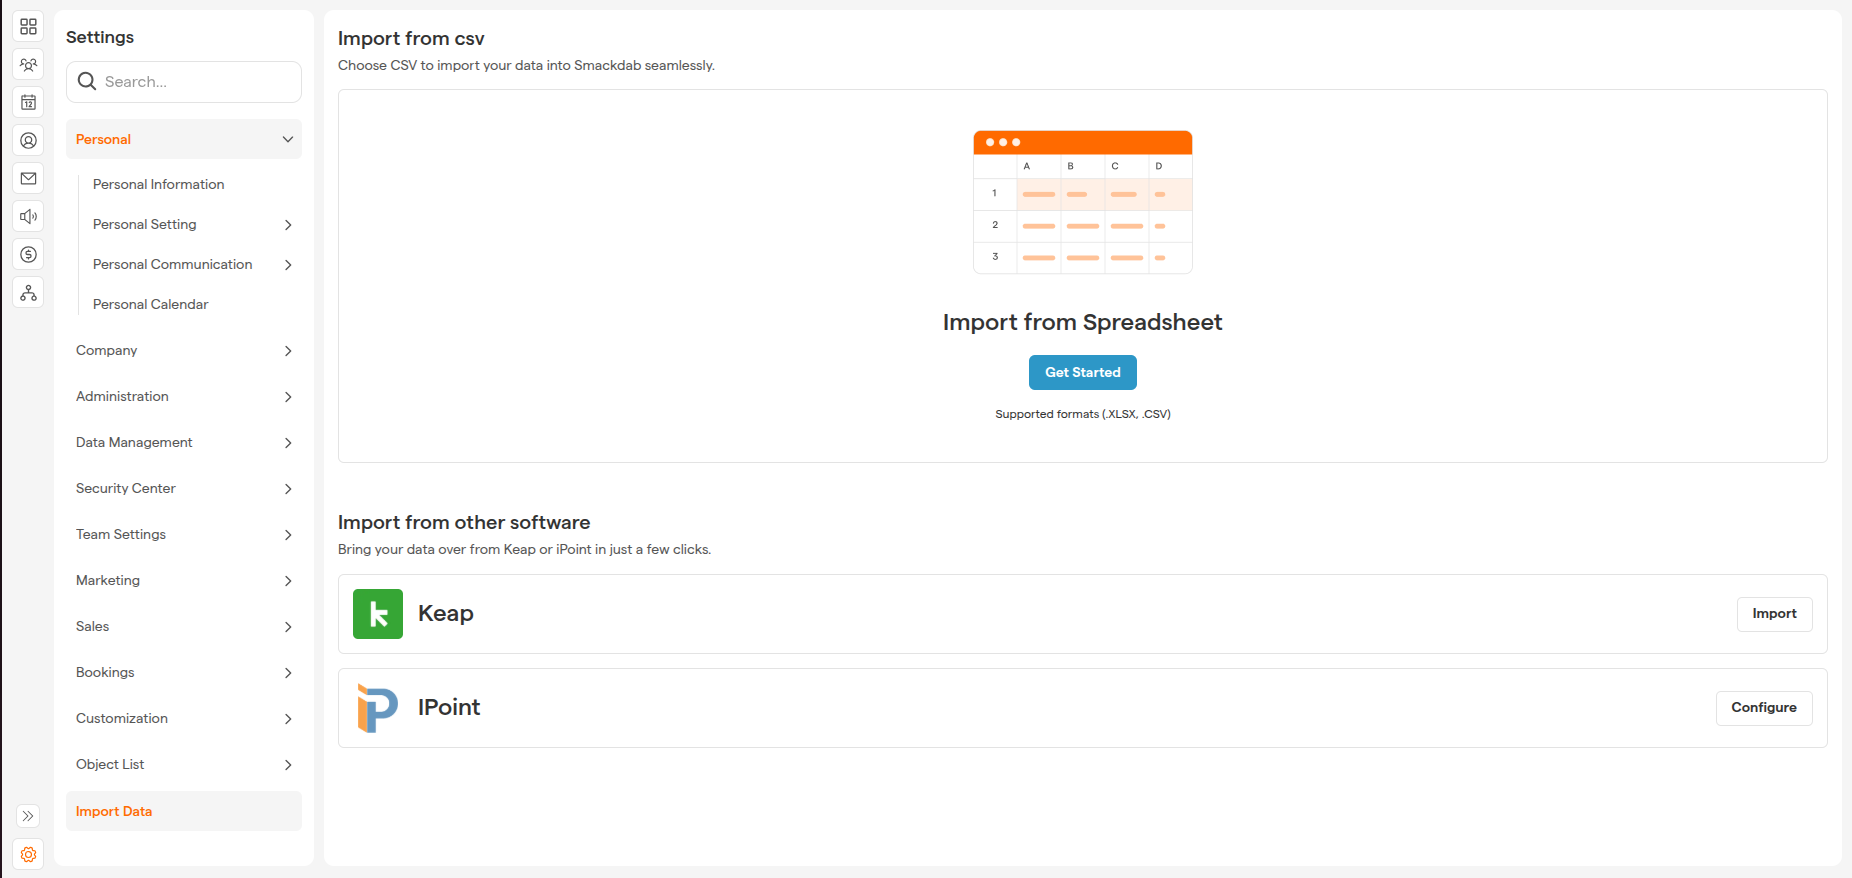
Click Get Started to begin a new import.
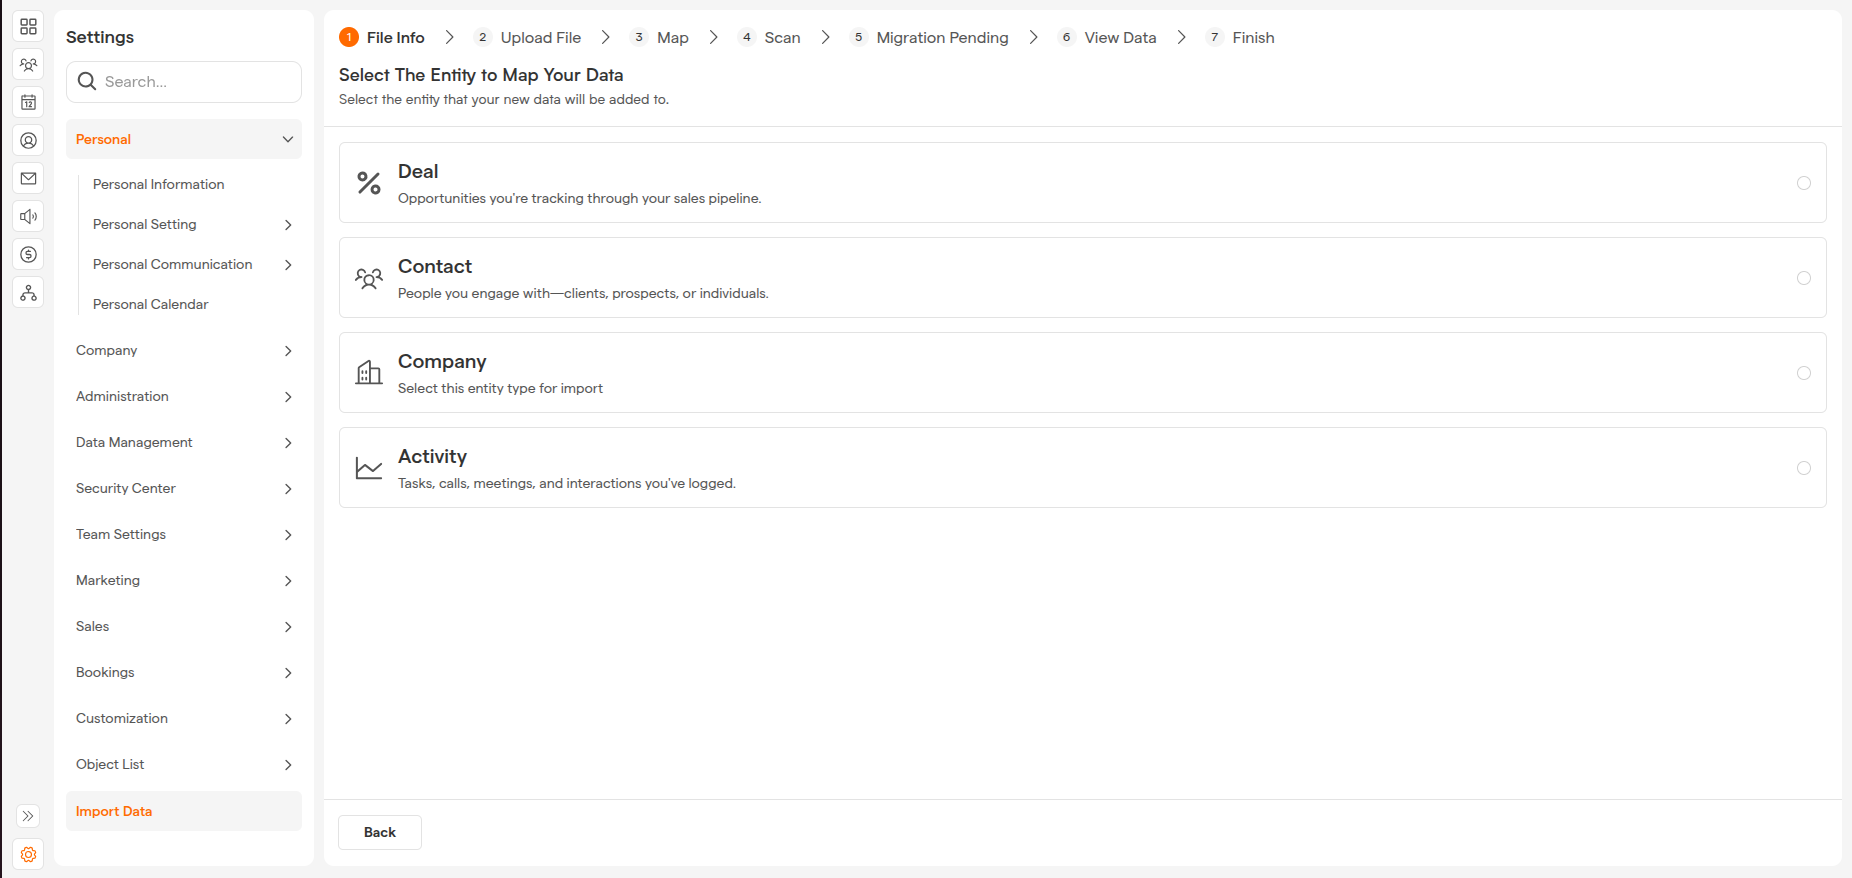
Step 2: Select the Entity
Choose the entity you want to import data into, such as:
Contacts
Companies
Deals
Leads
Activities
Once you click on an entity, you will be automatically redirected to the next step.
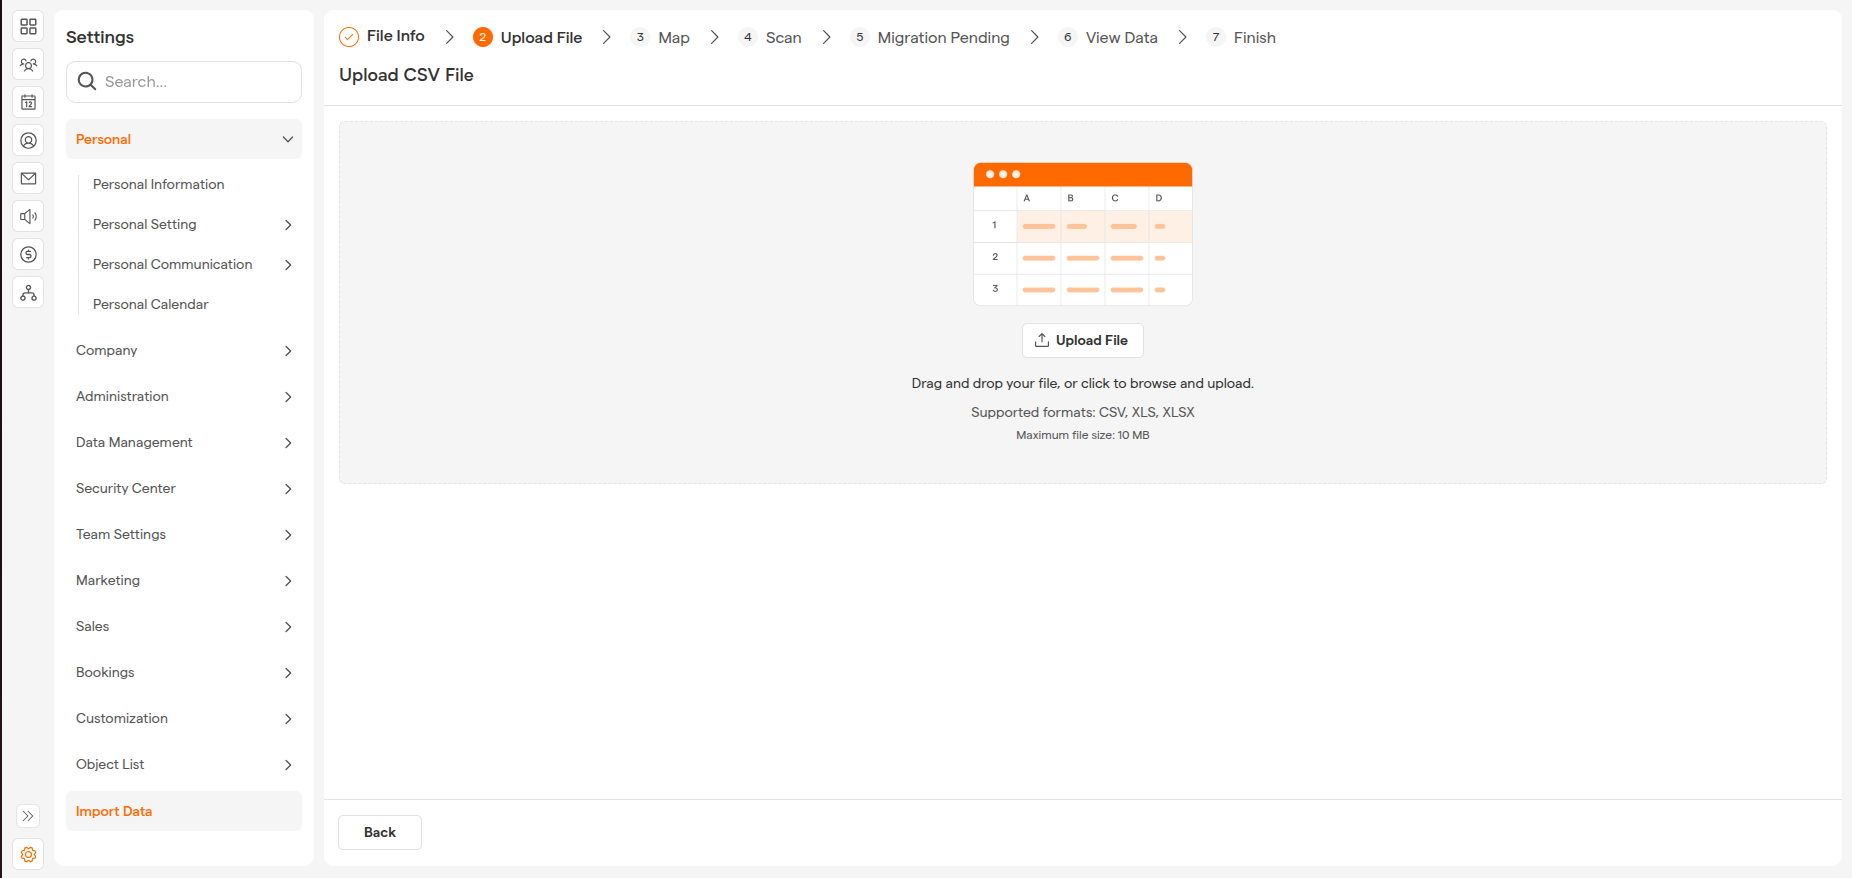
Step 3: Upload Your CSV File
Upload your CSV file by dragging it into the upload area or clicking Upload File.
After uploading the file, you will be automatically redirected to the mapping step.
Step 4: Choose Import Mode
Before mapping fields, choose how you want Smackdab to handle your data.
Add Mode (Insert New Records)
Adds all rows from the CSV as new records.
-
For each column, you can choose:
Import
Do Not Import
Use this mode when you are uploading new data for the first time.
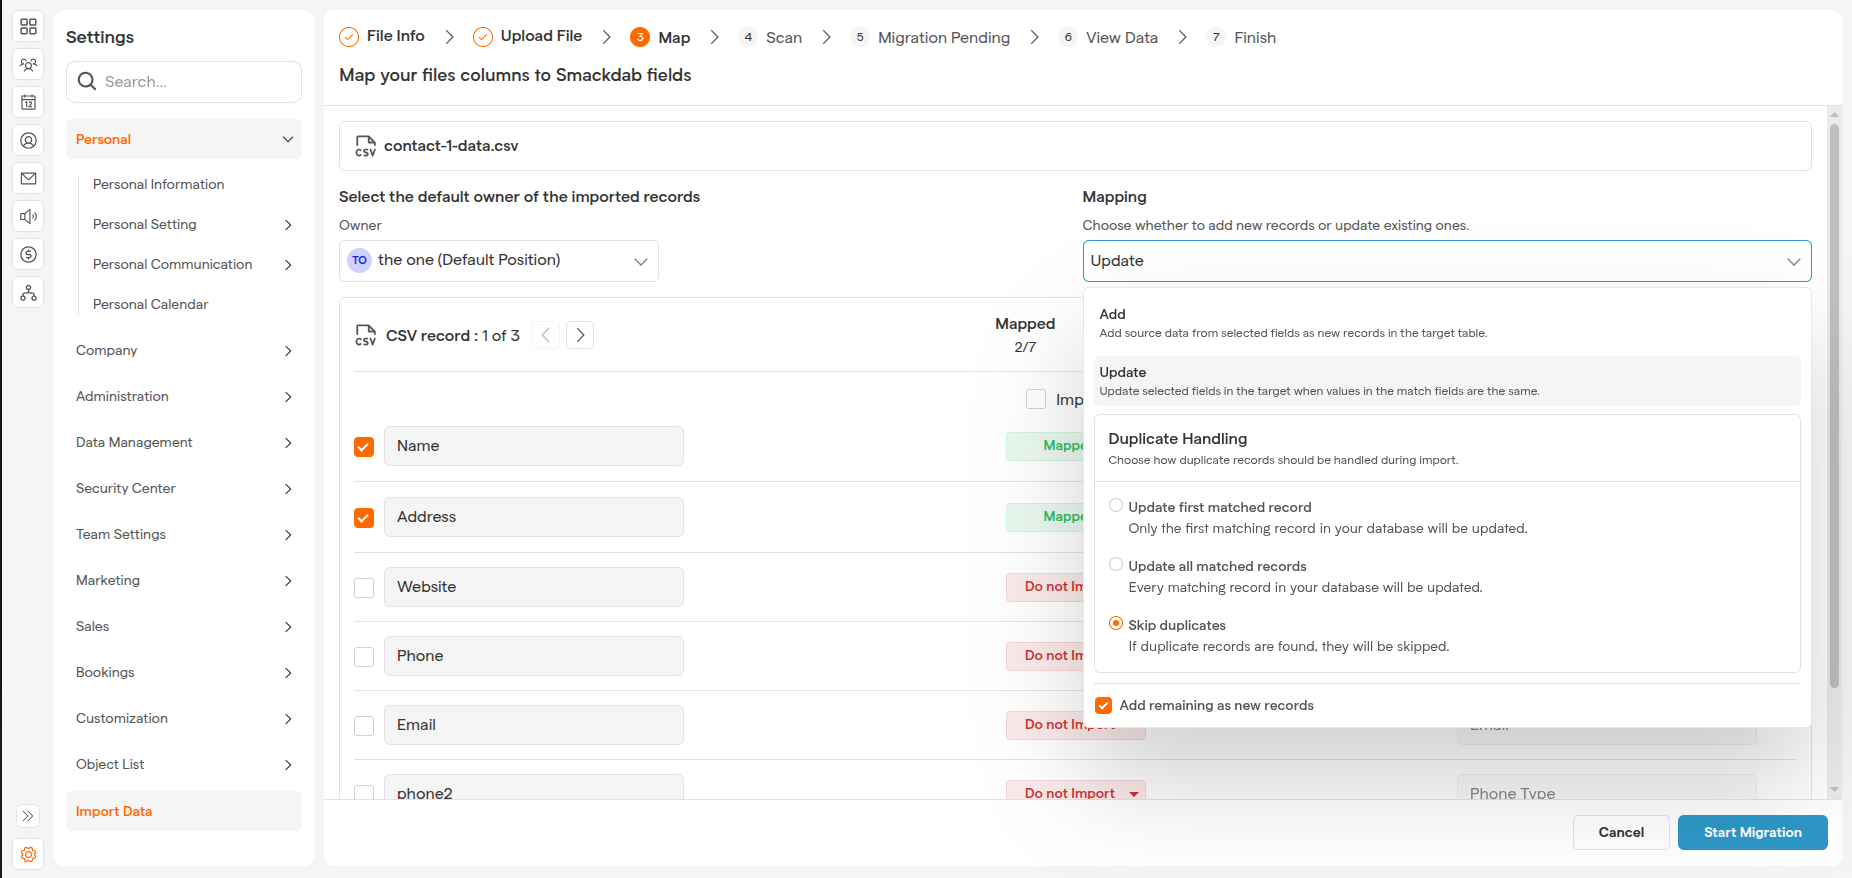
Update Mode (Update Existing Records)
Update mode is used when you want to update existing records in Smackdab.
In this mode, each column provides the following options:
Import
Do Not Import
Map Fields (used to match records)
When Update is selected, you will see an additional option:
Update Options
Update Matched Records Only: Updates records that match the selected key fields.
Update all Match Records: Updates matching records.
Skip Duplicates: Skips the duplicate records.
Note: If you want to creates new records for unmatched rows. please check the option Add remaining as new records
Use this mode when your CSV contains changes to existing data.
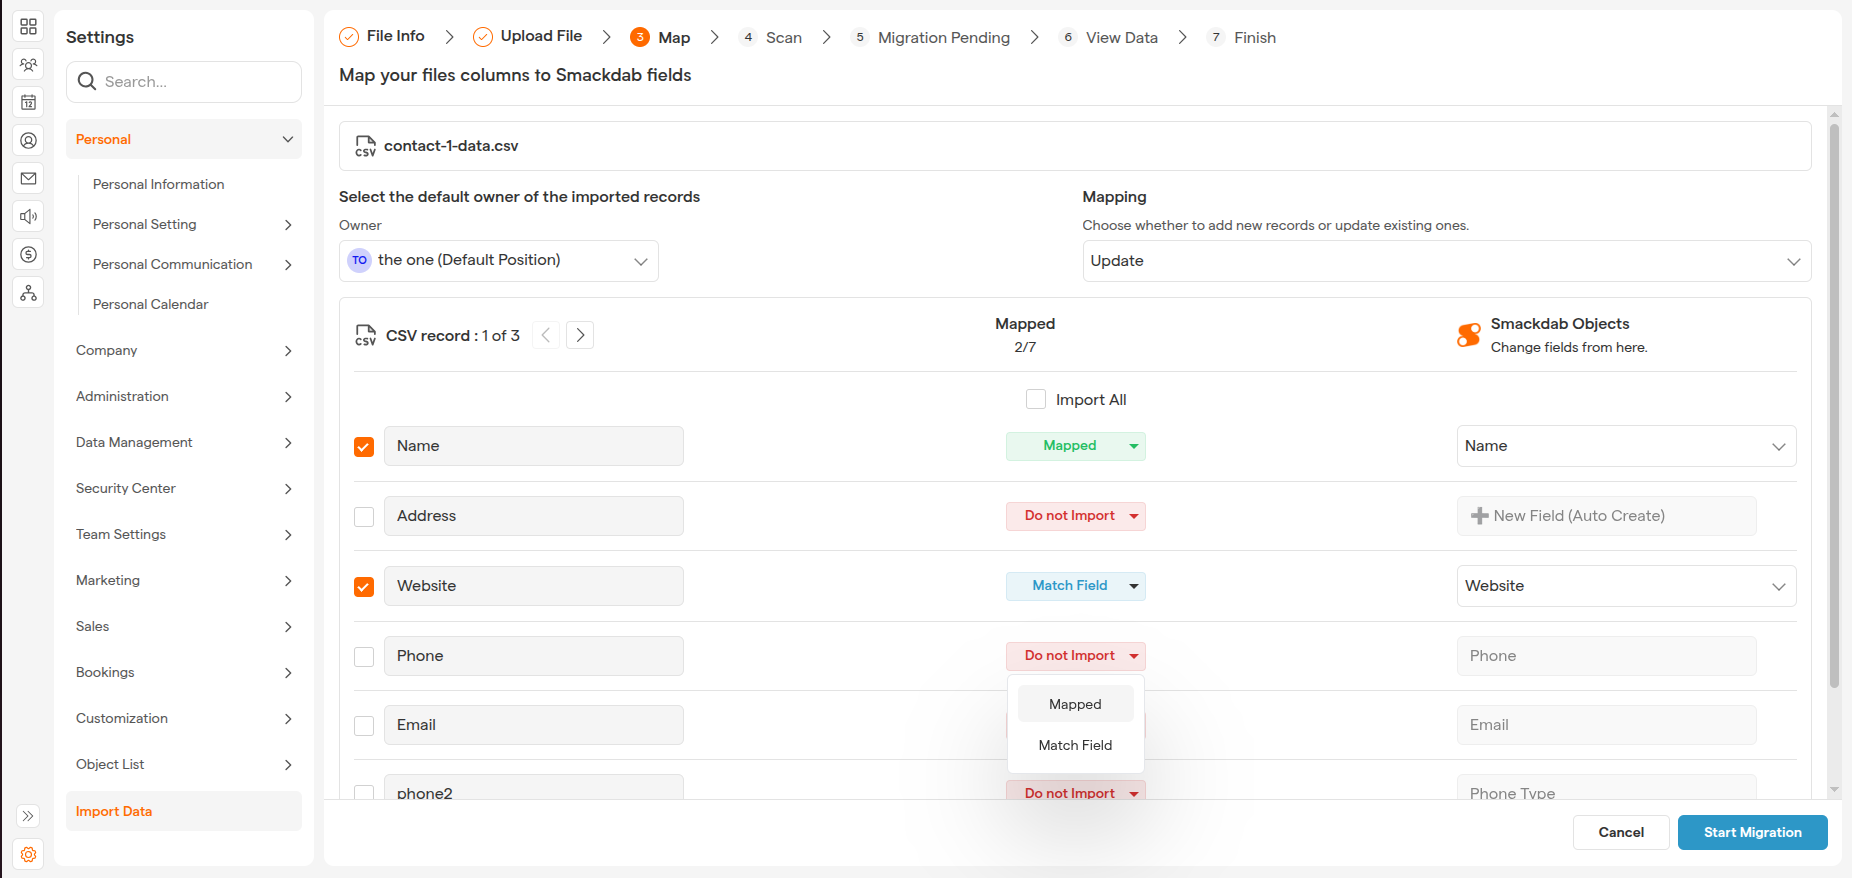
Step 5: Map CSV Fields to Smackdab Fields
On the mapping screen:
Each column from your CSV appears on the left.
Match each column to the appropriate Smackdab field.
Columns marked as Import will be included.
Columns marked as Do Not Import will be skipped.
If unmapped columns are detected, Smackdab will notify you and give you the option to:
Add new custom fields
Skip those columns
Once mapping is complete, click Start Migration.
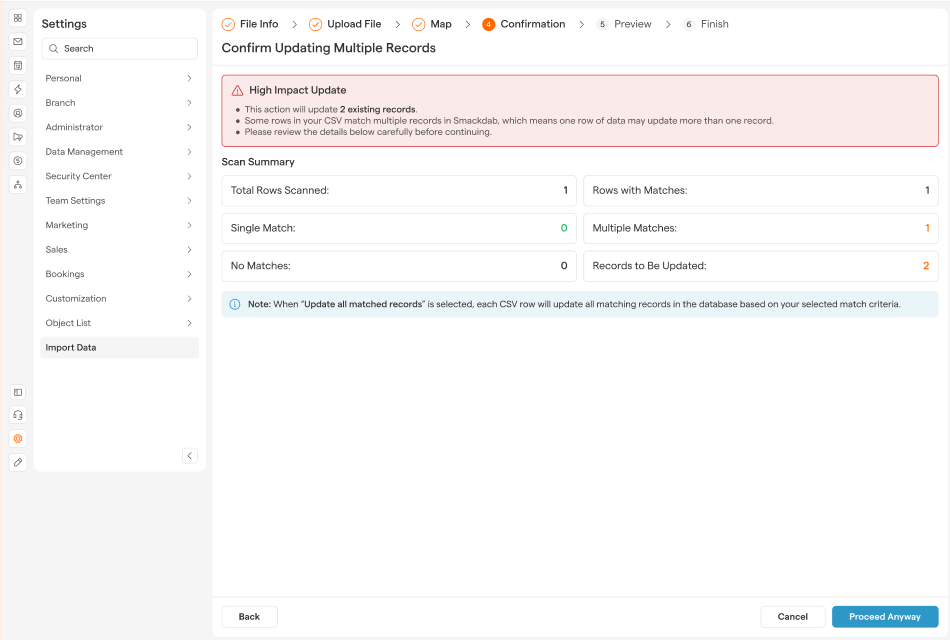
Step 6: Review and Confirm - If you've selected Update all match records option
Before finalizing the import, Smackdab will scan your data and show a summary:
Total rows scanned
Records with matches
Multiple matches
Records to be added or updated
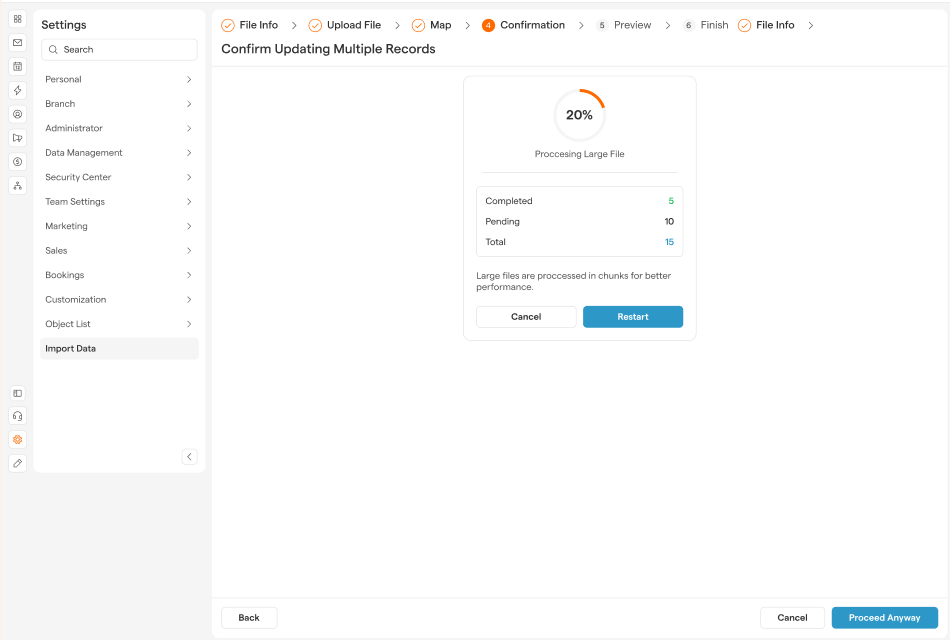
If multiple matches are found, you will be asked to confirm how the data should be handled.
Click Proceed Anyway to continue.
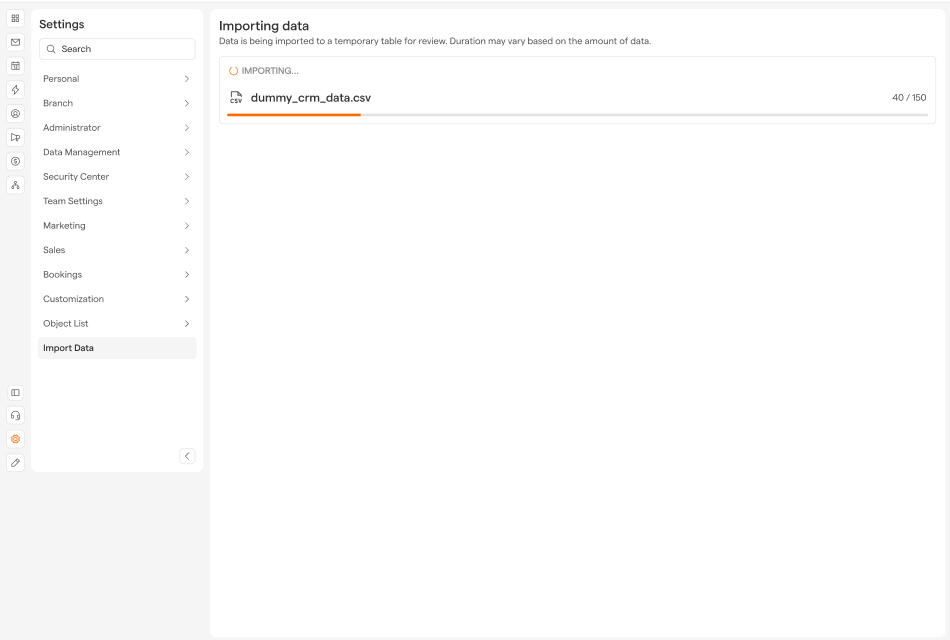
Step 7: Import Data process
Smackdab data import process
Show the status of the import process
Large CSV files may take longer to process.
Click View Data to review the imported records.
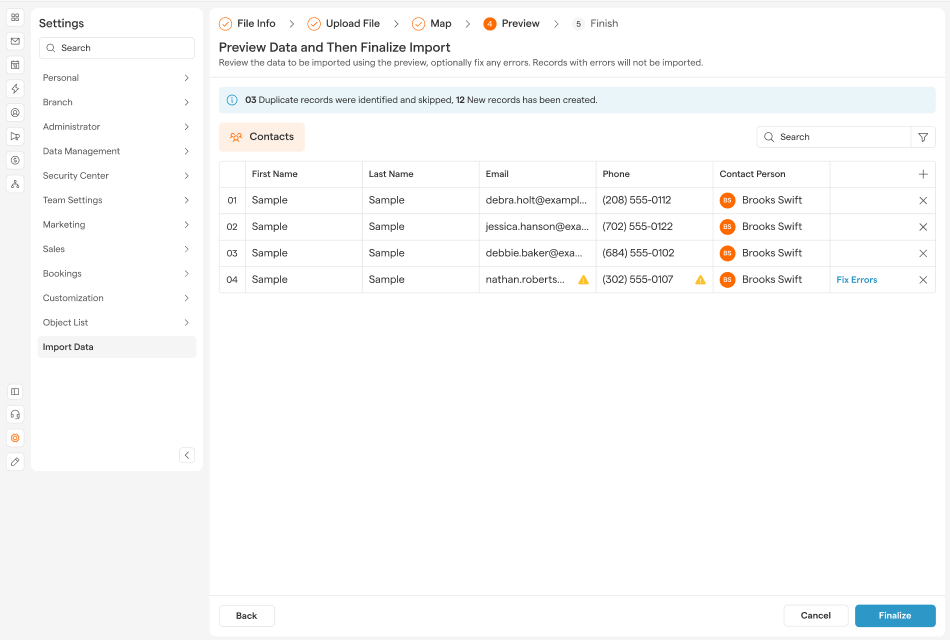
Step 8: Preview & Finalize the Import
Once the import is complete:
See a preview of your data before importing.
Ensure fields and values look correct.
You will see a confirmation screen.
Click Finalize to complete the process.
Your data will now be available in the selected entity section in Smackdab.
Notes & Best Practices
Use Add mode for new data and Update mode for modifying existing records.
Ensure key fields (such as Email or Phone) are mapped correctly when updating records.
Review the preview screen carefully to avoid incorrect updates.
Large CSV files may take longer to process.