
Ready to get started? Customizing Job Roles is a breeze.
How to Add Job Roles
-
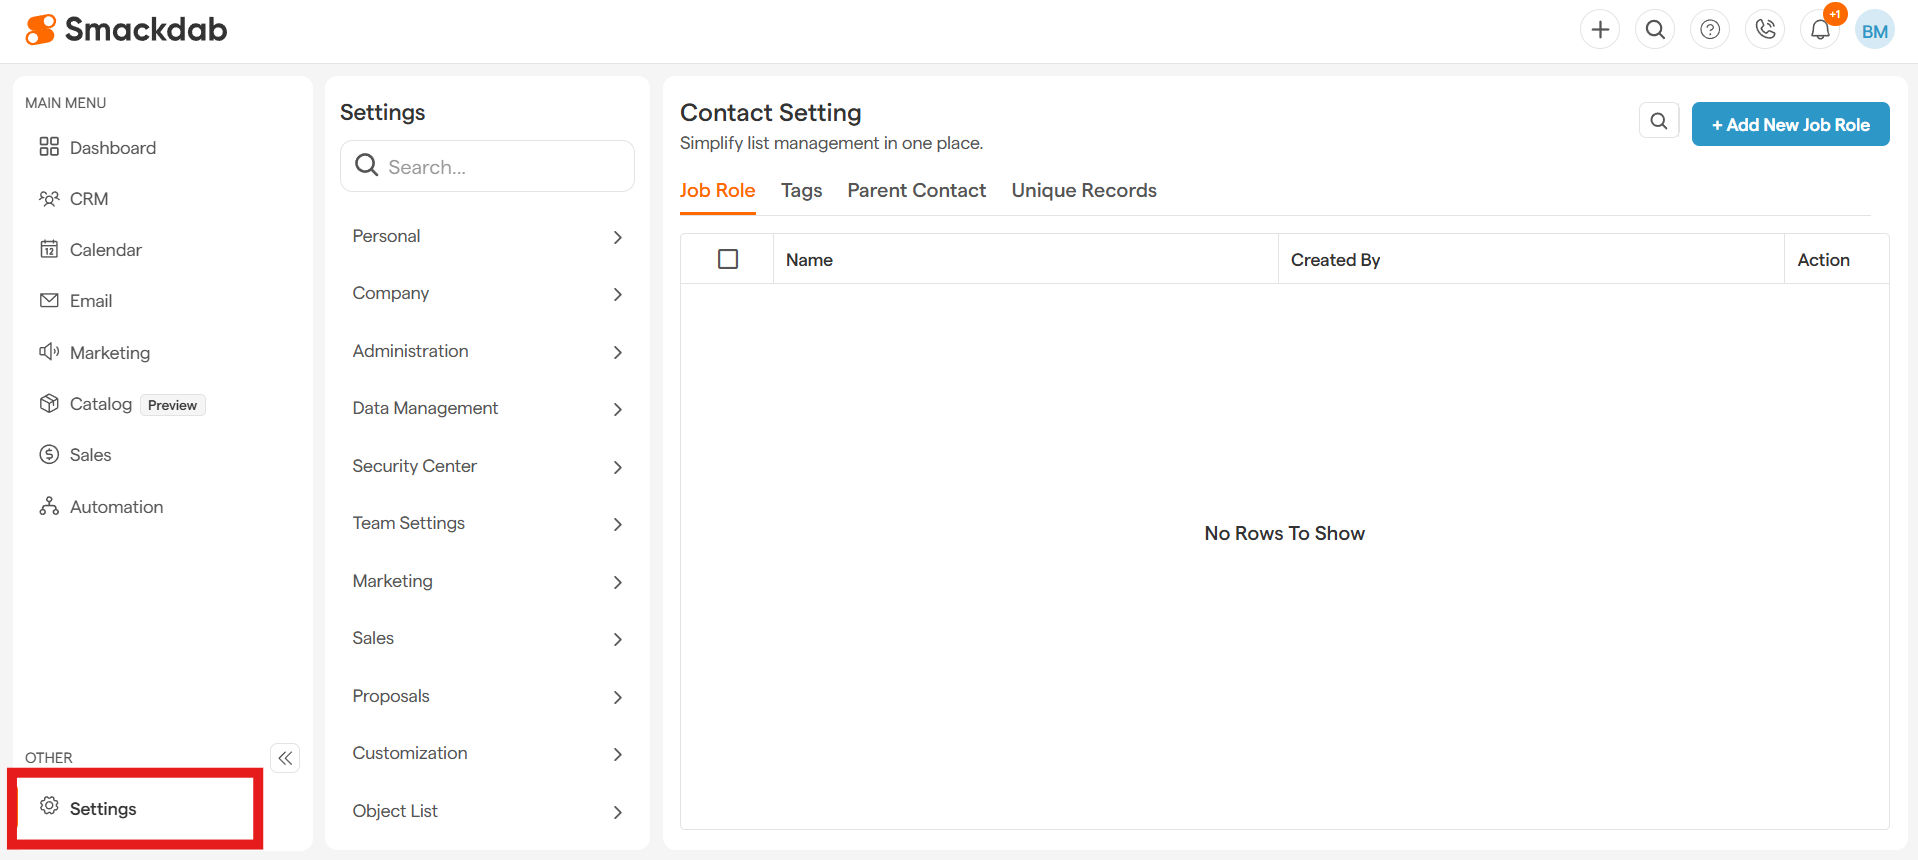
Select Settings
-
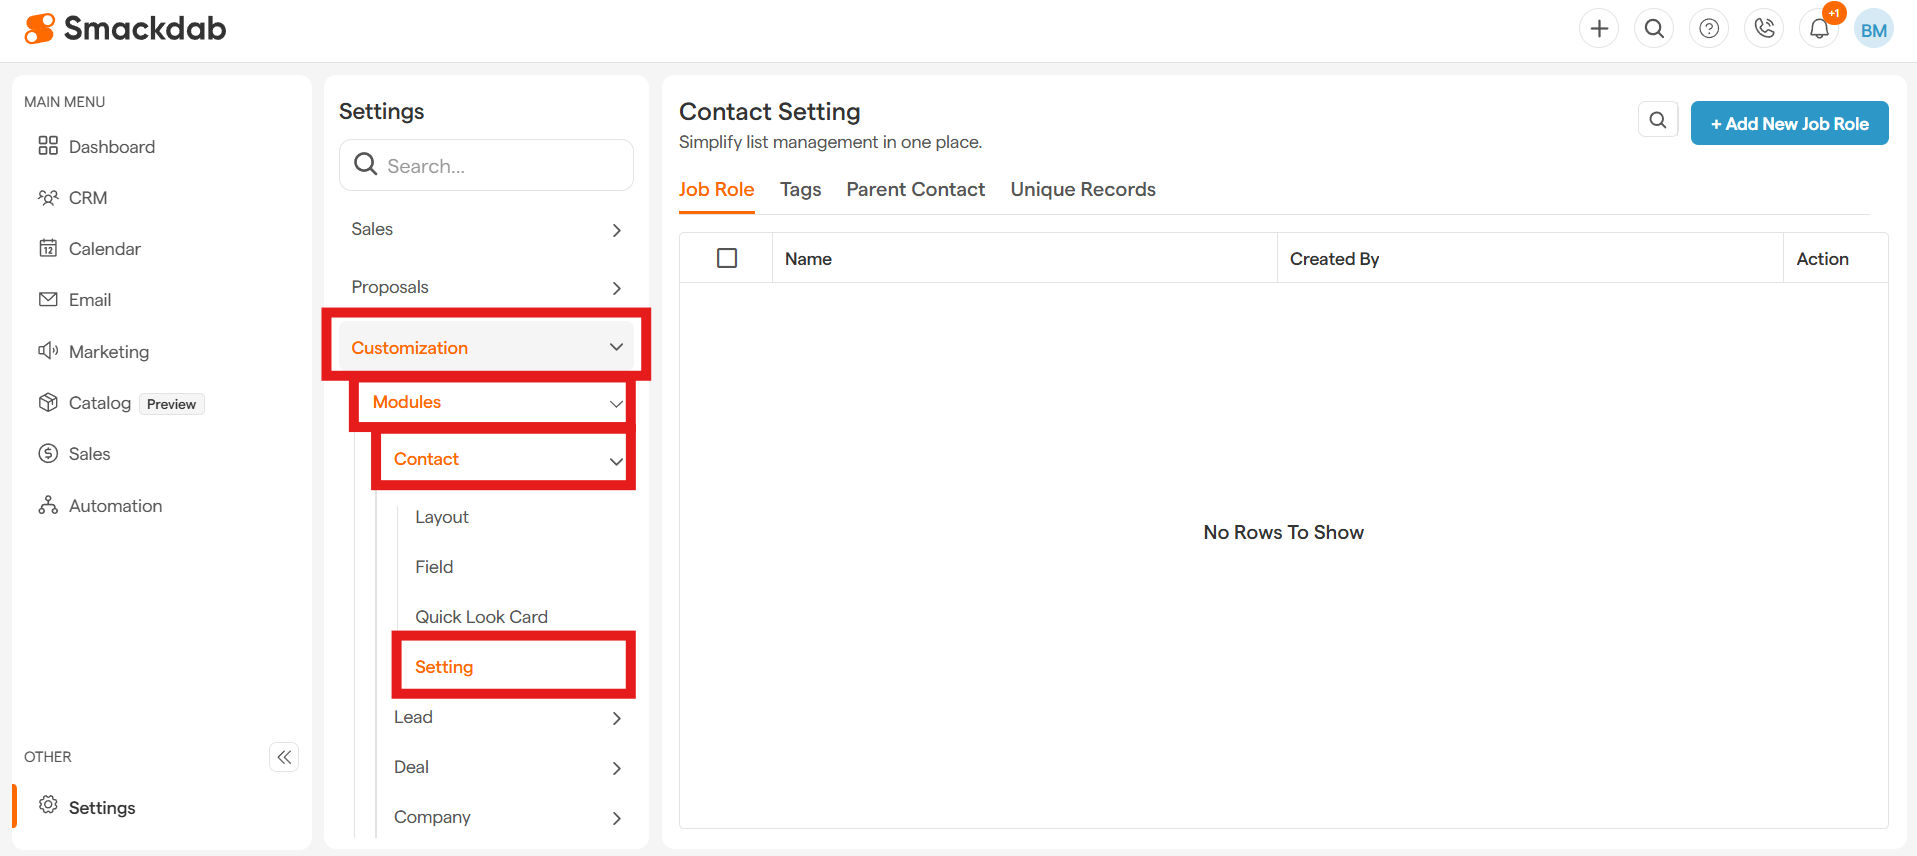
Navigate to the Contact Module Settings
Select the Customization drop down, then select Modules, then select Contact, then select Setting.
-
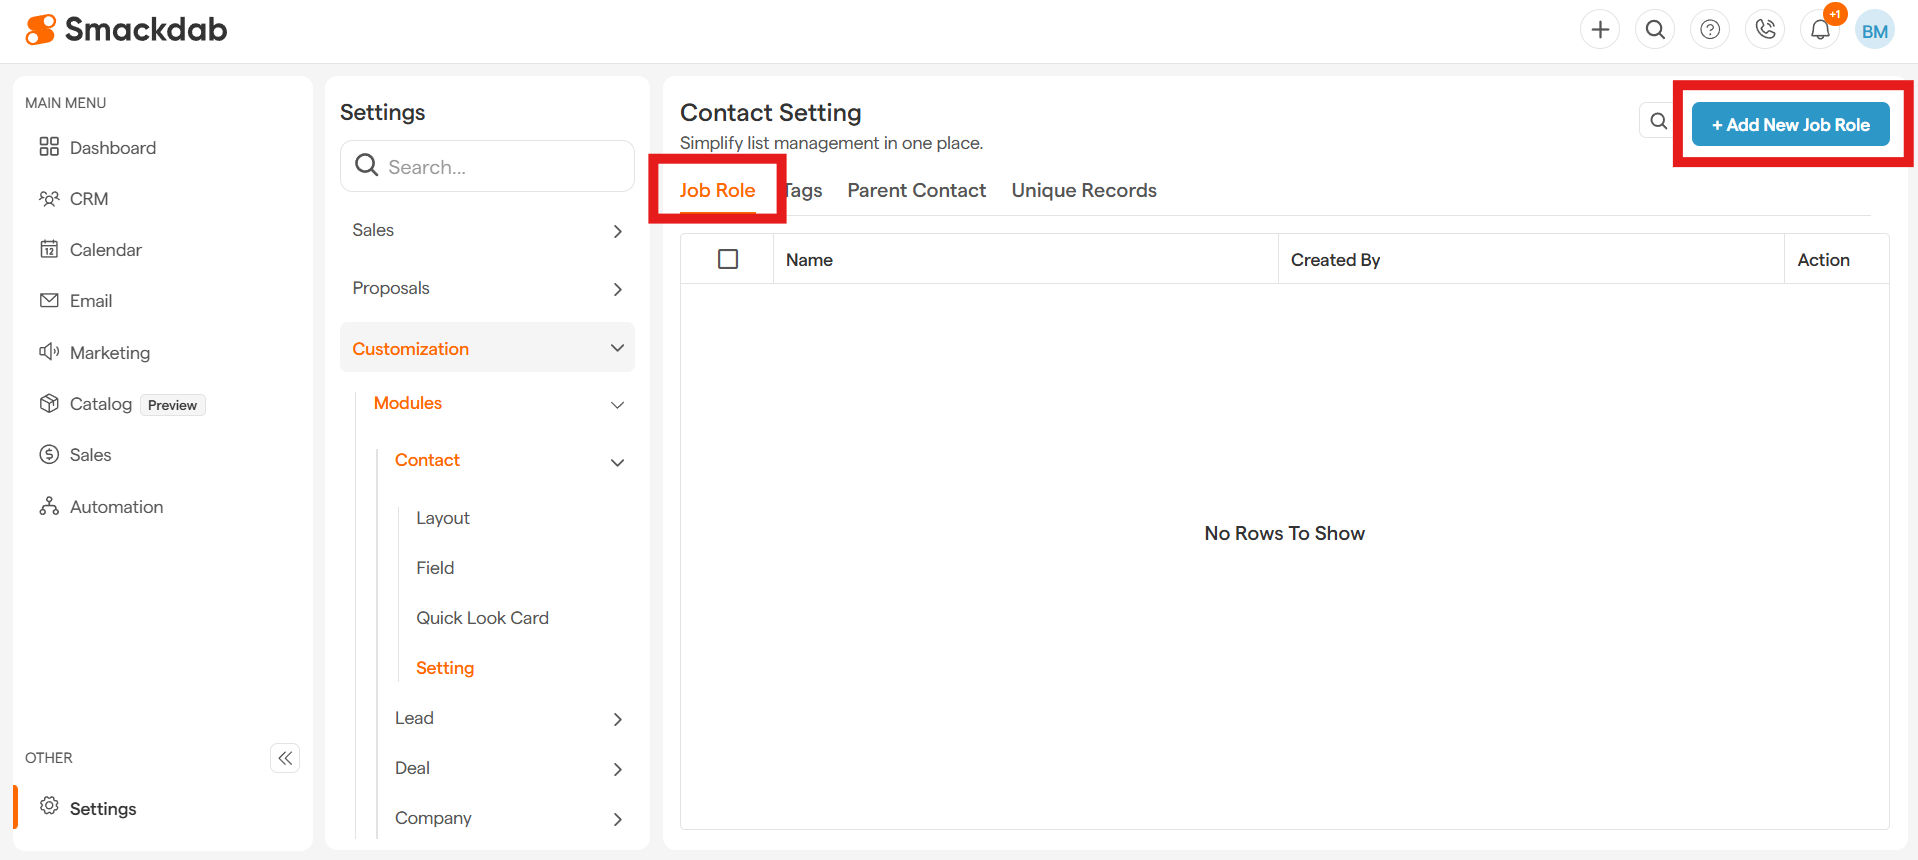
In the Job Role tab, select + Add New Job Role
-
Add Job Role
Type name of Job Role in the text box.
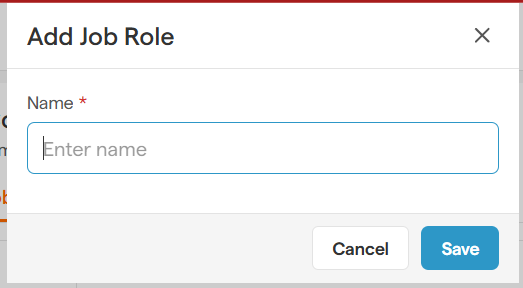
Click Save, and you're all set!
Managing Job Roles
Once you've created your roles, they'll all appear on the Job Role Listing page. From here, you can:
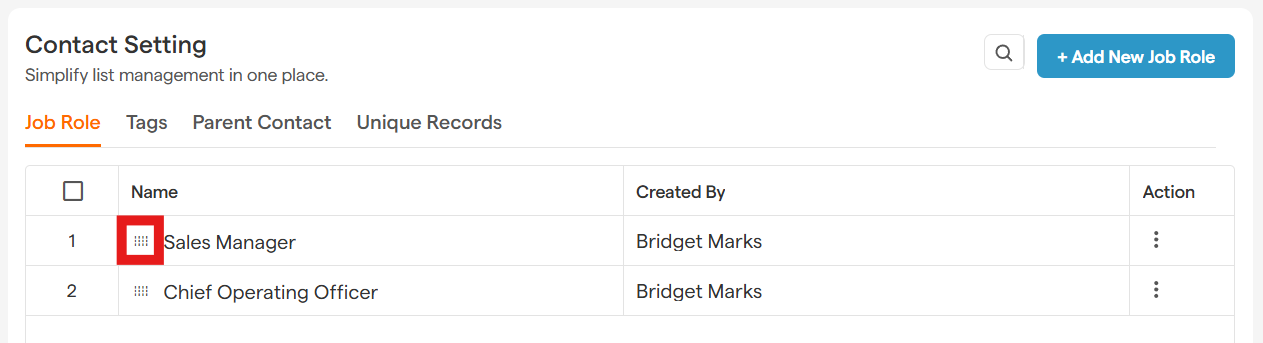
Edit or Delete: Click the three vertical dots under the Action header next to any job role to make changes.
-
Reorder: Simply click on the area shown below to drag and drop the roles to arrange them in the order you prefer.
Using Job Roles When Adding a Contact
You can assign job roles on the fly right from a contact's record.
Open the Add/Edit form for any contact.
Find the Job Title field. This is a special dropdown field you can type into.
Select a Role: If you've already set up your Job Roles in Settings, you can pick one from the list.
Create on the Spot: Don't see the role you need? You can type a new one directly into the field and create it instantly!
Quick Note: Job roles created directly from a contact's form won't be added to your main, reusable list in the Settings area. It's a great option for one-off titles!