
Customize Your Timeline: See What Matters Most!
Your timeline is the complete story of your relationship with a customer, but sometimes you need to cut through the noise to find exactly what you're looking for. With Timeline Custom Views, you can take full control, creating personalized filters to see only the most relevant activities and updates.
Whether you want to review all past emails, see only your notes, or check on recent call logs, a custom view helps you make smarter decisions, faster.
Creating Your First Custom View
Ready to build a view that's perfect for you? Let's get started.
-
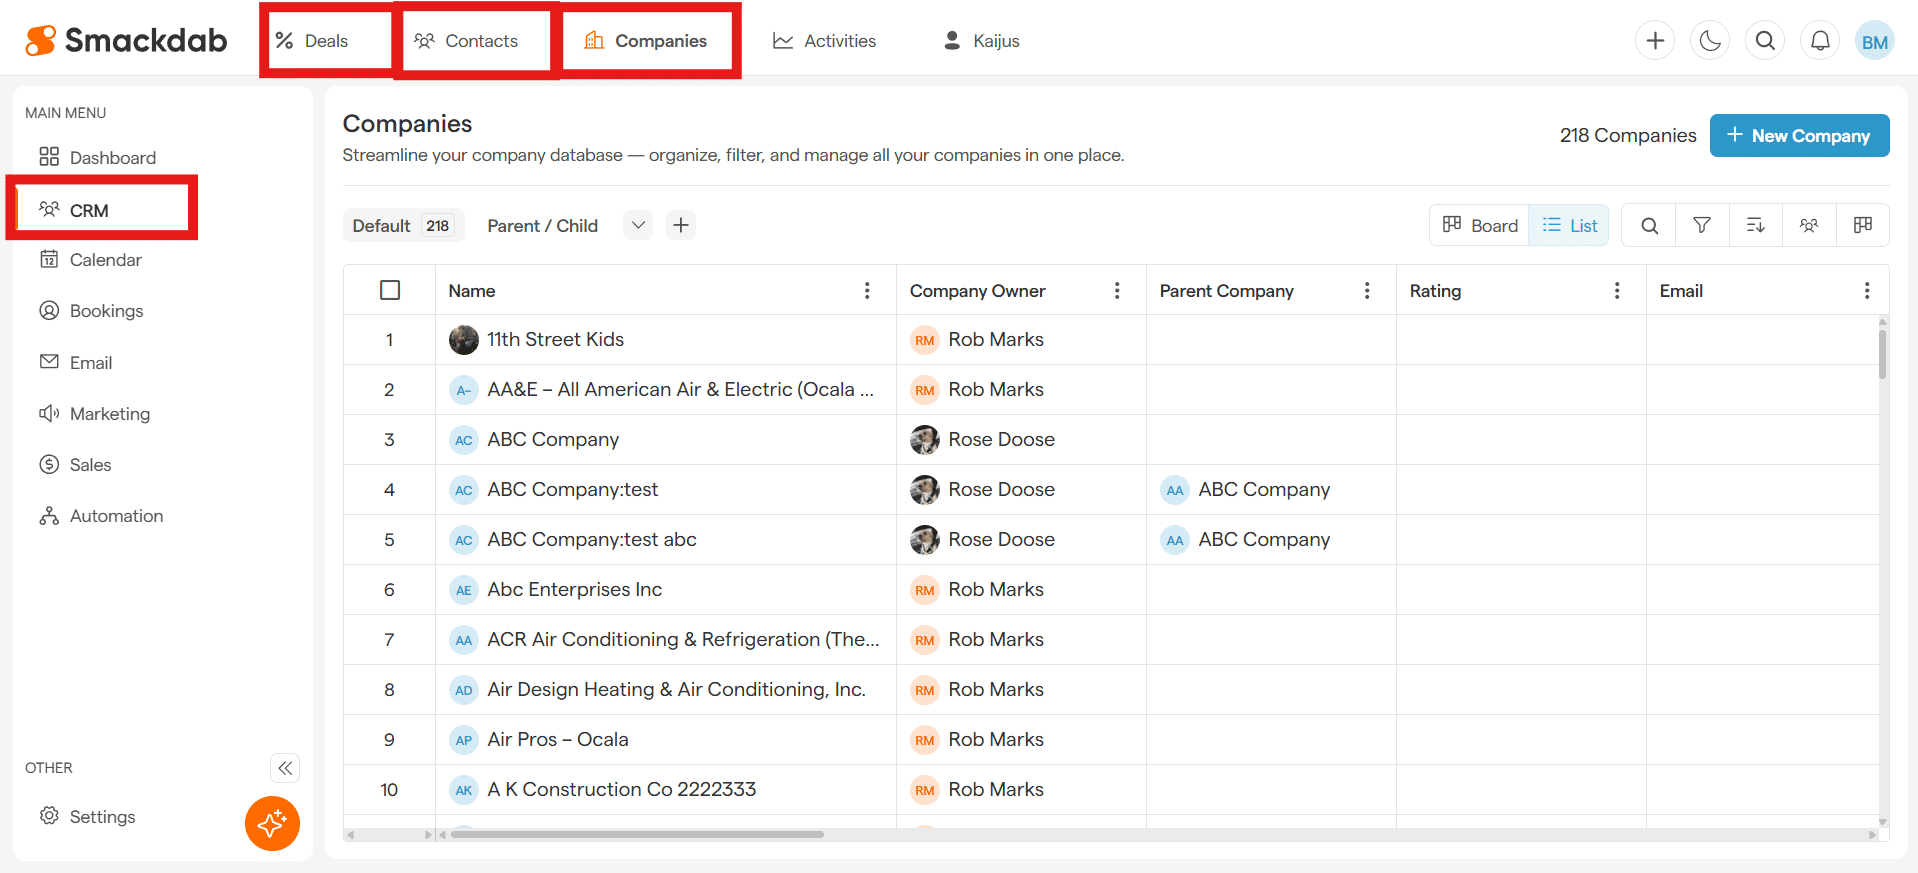
Navigate to any record detail page.
From the CRM tab on the Main Menu, select, Deals, Contacts, or Companies in the top bar. Then select a record by clicking on it's name.
-
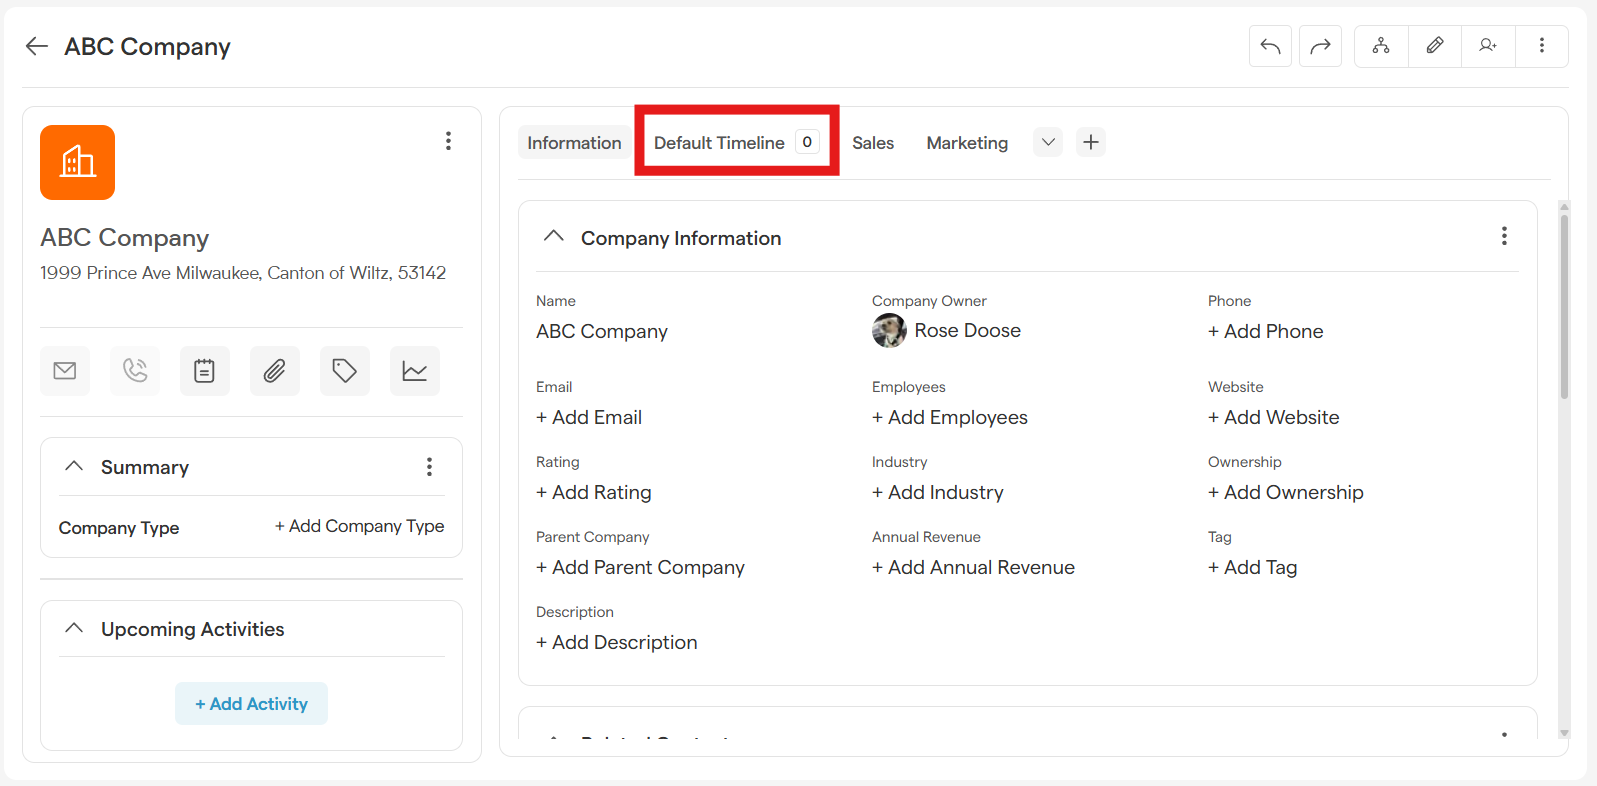
Click on the Timeline tab.
-
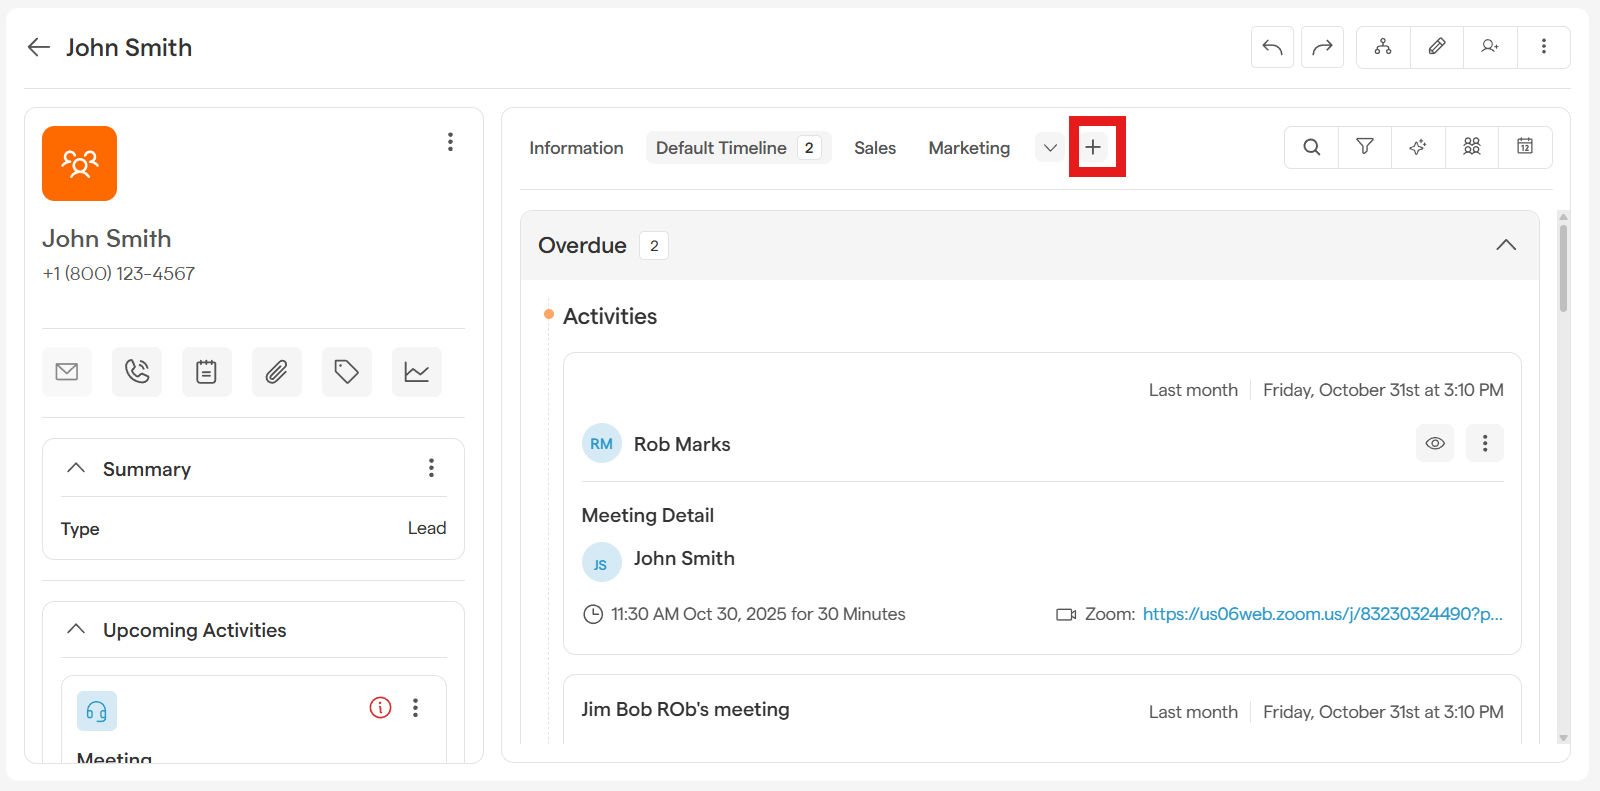
Click the + View button to open the creation screen.
Timeline View
In the pop-up window, give your view a name and then choose what you want to see. You can filter your timeline by:
Key Activities: Show only specific actions like Tasks, Calls, SMS, or Meetings.
Emails: Zero in on all email conversations. You can even filter by emails you've Sent vs. Received.
-
Notes & Documents:
Notes: See a clean list of just the notes you've added.
Documents: Instantly find all attached files and links.
Related Record: Display notes and documents from the contact's associated Company, or vice versa.
Info: Track all the important changes made to a record's fields over time.
Sharing Your View: Public vs. Private
You decide who gets to use your new view.
Private View: This is your personal view, visible only to you. It's perfect for creating a workflow that's tailored to your unique process.
Public View: Share the love! A public view is available to everyone on your team, helping to standardize processes and share best practices.
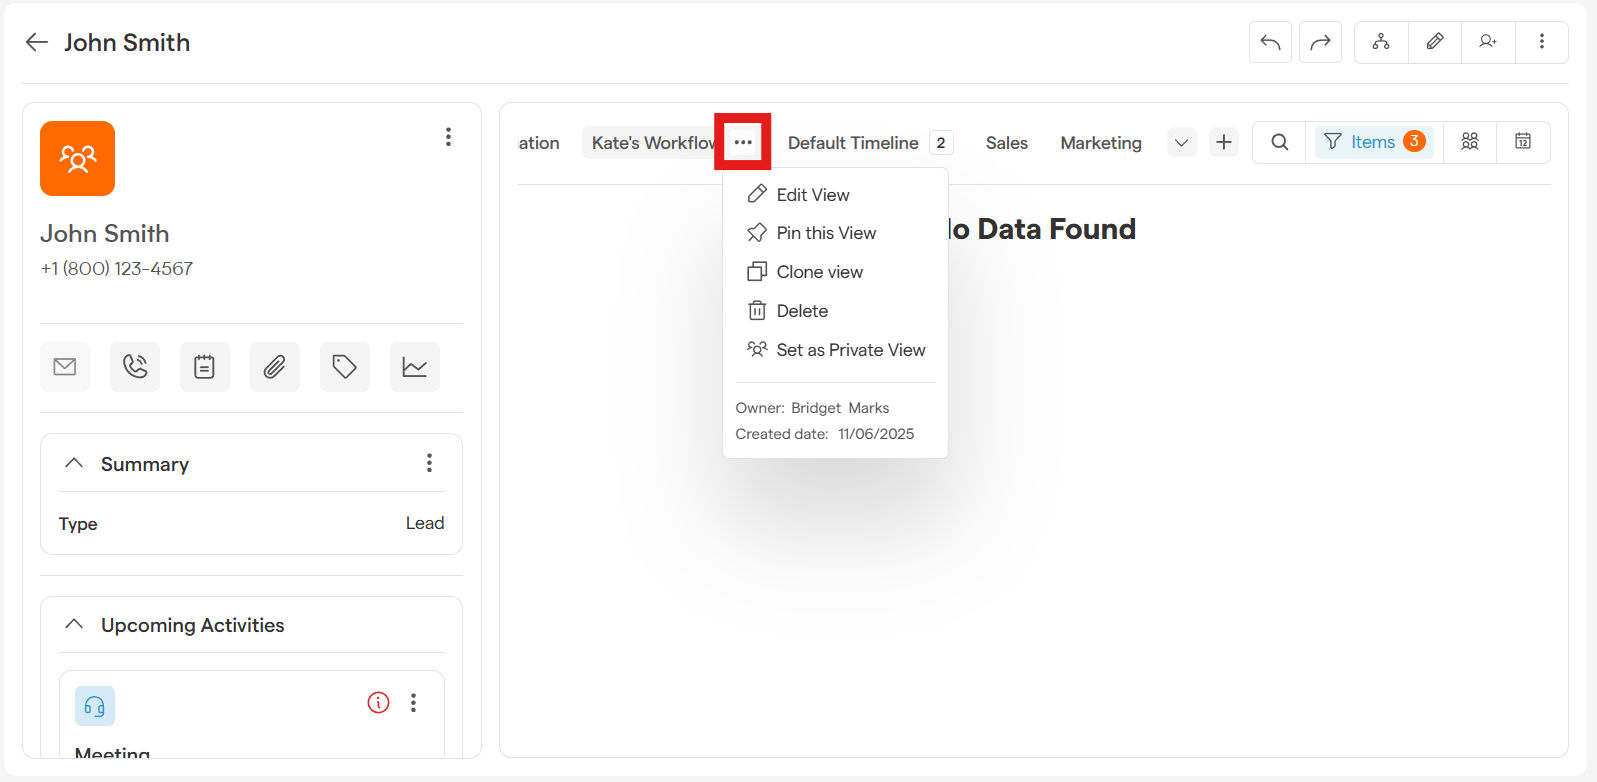
You can set this preference in the creation window or change it anytime. Just click the three-dots icon next to the view's name to open the details panel and switch between Public and Private.
Keep in Mind: A custom view is created for a specific record type. For example, if you create a "Follow-Up View" on a Contact's record, that same view will be available for all of your contacts!
Power-Up Your Workflow: Managing Your Views
Once you've created a few custom views, you can organize them to work even more efficiently. Click the three-dots icon next to any view name to access these powerful options.
Pin Your Favorites
Do you have a view you use all the time? Pin it! Pinning a view keeps it at the top of your list for quick, one-click access. Just select Pin This View to lock it in place. You can unpin it anytime.
Clone a View in Seconds
Need a slightly different version of an existing view? Instead of starting from scratch, just clone it!
Select Clone View to create an exact, editable copy.
Rename the new view and tweak the filters as needed.
Your original view remains completely unchanged.
Organize with Drag-and-Drop
Arrange your list of views in any order you like.
-
Click the down arrow next to the current view name to see your full list.
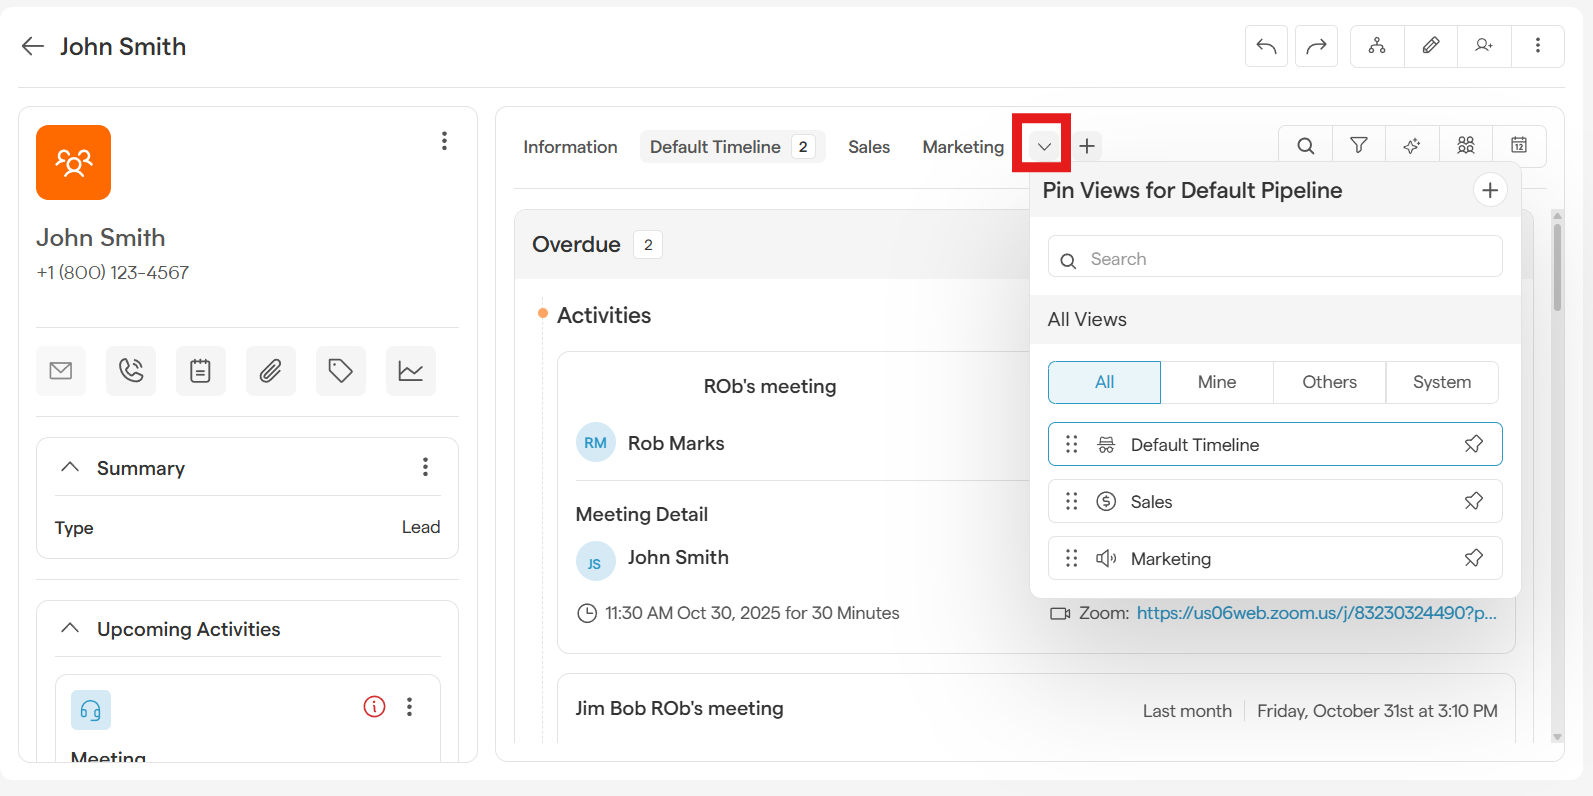
-
Simply click the six dots, hold, and drag any view up or down to its new position.
Smackdab automatically saves your new order, so your views will always be right where you need them.