
Prepare for a workflow revolution! We're about to show you the ultimate hacks for streamlining your process: creating and updating templates like a pro, and then keeping them flawlessly organized using intuitive folders. You'll learn the ropes of setting up new folders, easily adding your existing gems, and even crafting brand new templates right where they belong. Get ready for seamless organization and instant access to everything you need!
Ready to get organized? Let's create a new folder for your email templates!
Start in Marketing: First, click on "Marketing" from your main menu.
Head to Your Templates: Under Marketing, select "Templates."
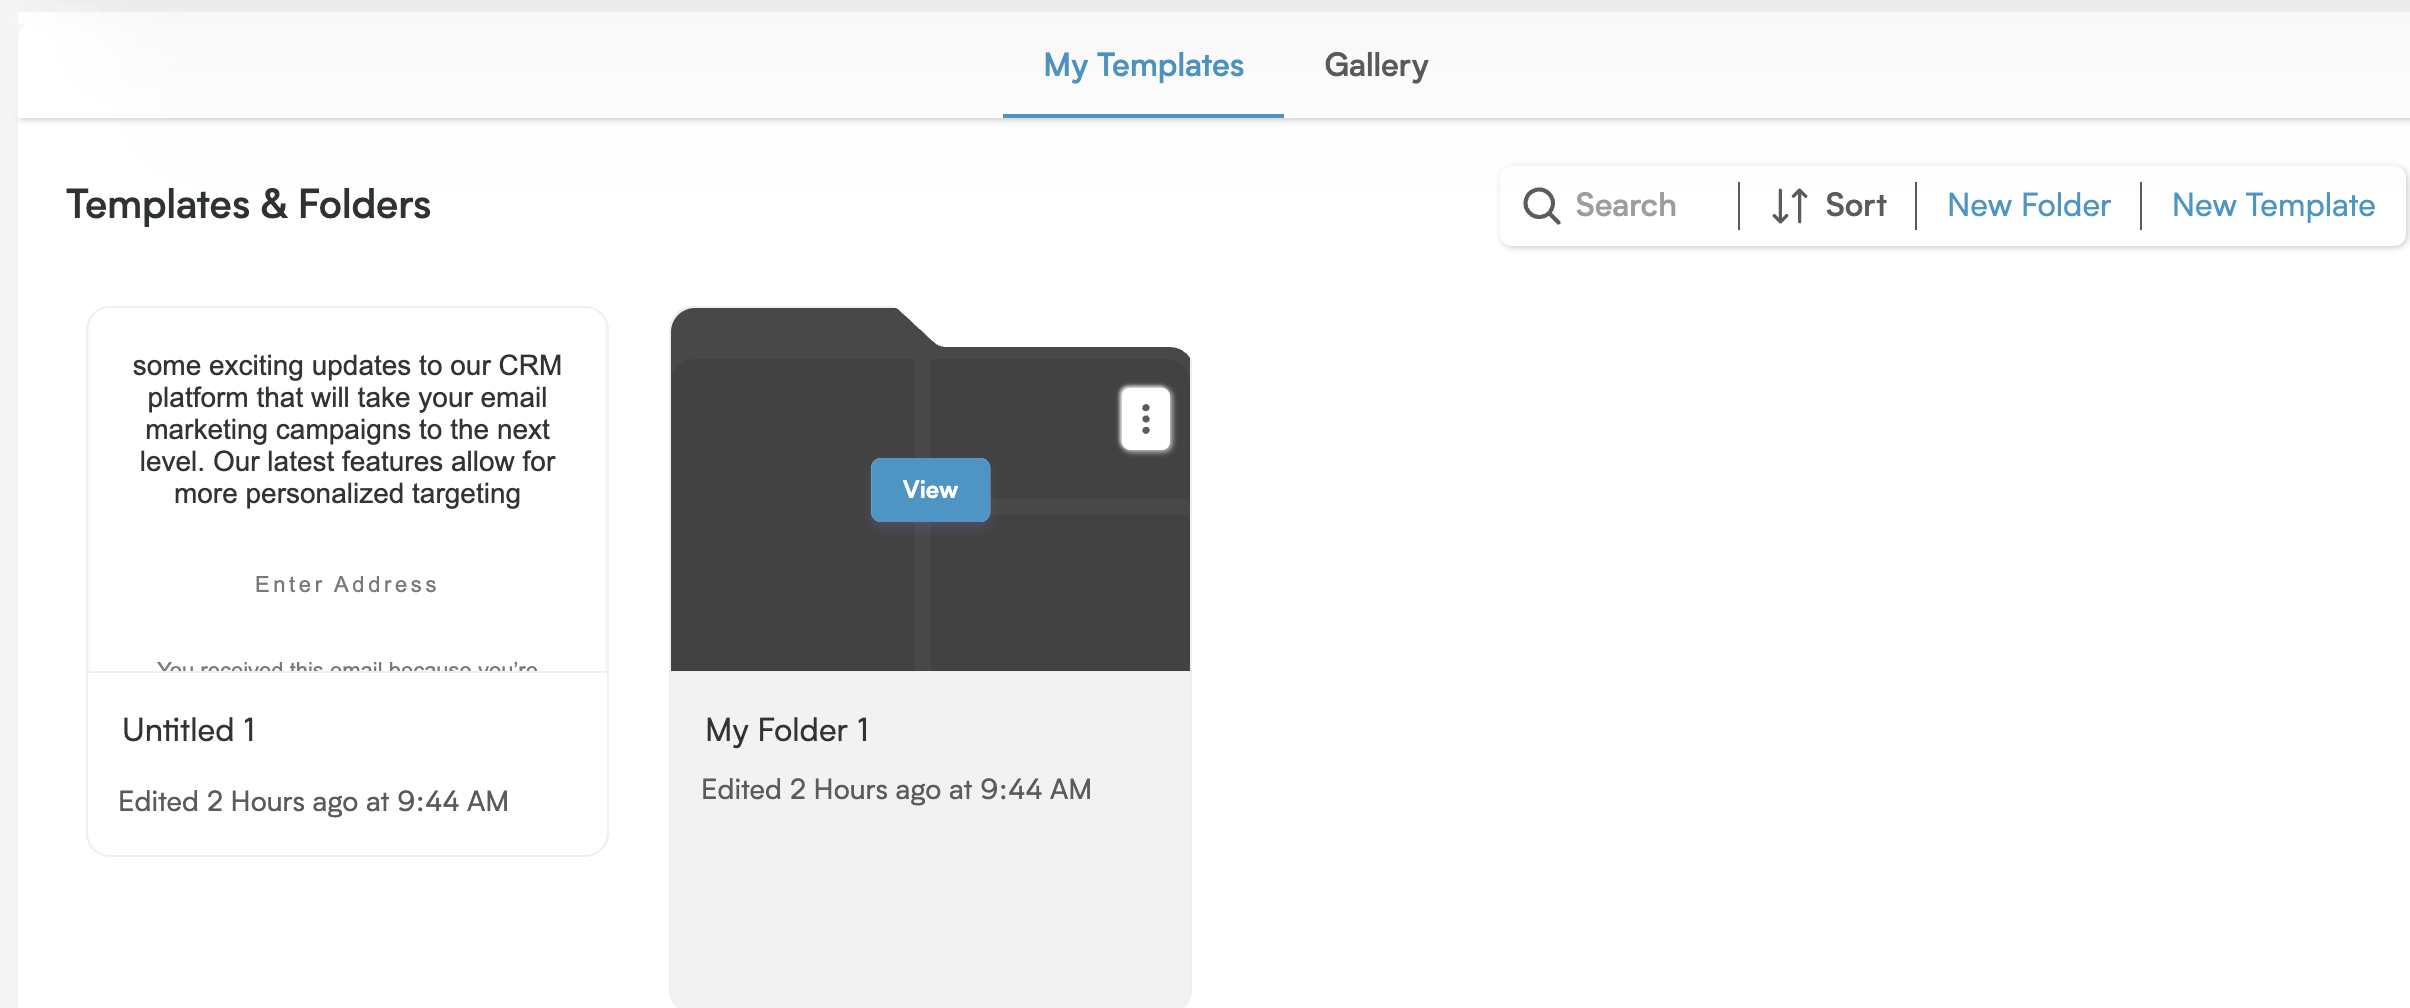
Choose "My Templates": You'll notice two tabs: "My Templates" and "Gallery." Go ahead and click on the "My Templates" tab. This is where your personalized templates live.
-
Spot the "New Folder" Option: On the right side of the "My Templates" area, you'll see a list of actions you can take. Look for and click on "New Folder."

-
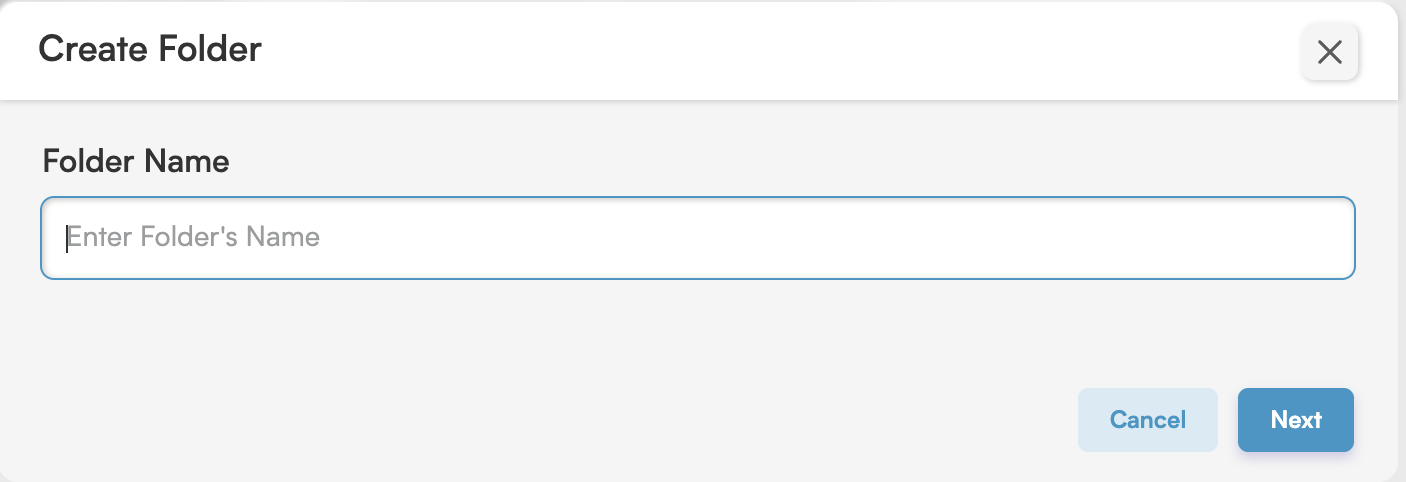
Name Your Folder: A "Create Folder" window will pop up. Type in a clear and helpful name for your new folder, then click the "Next" button.
Add Your Templates: Now, you'll see a window called "Add Email Templates to Your Folder." This list shows all the email templates you've been working on.
Select and Save: Simply click to choose the templates you'd like to place in your new folder. Once you've made your selections, click "Save."
Folder Created! Excellent! Your brand-new folder will now appear right there under the "My Templates" tab, ready for you to use.
Ready to add a new template to one of your organized folders? Here’s how!
-
Open Your Folder: First, find the folder where you want to add the new template. Hover your mouse over the folder's name, and a "View" button will appear. Click "View."
You're Inside! Great! Clicking "View" takes you right into that folder.
-
Create Your New Template: Now that you're inside the folder, look to the top right corner. You'll see a "New Template" button. Go ahead and click it!
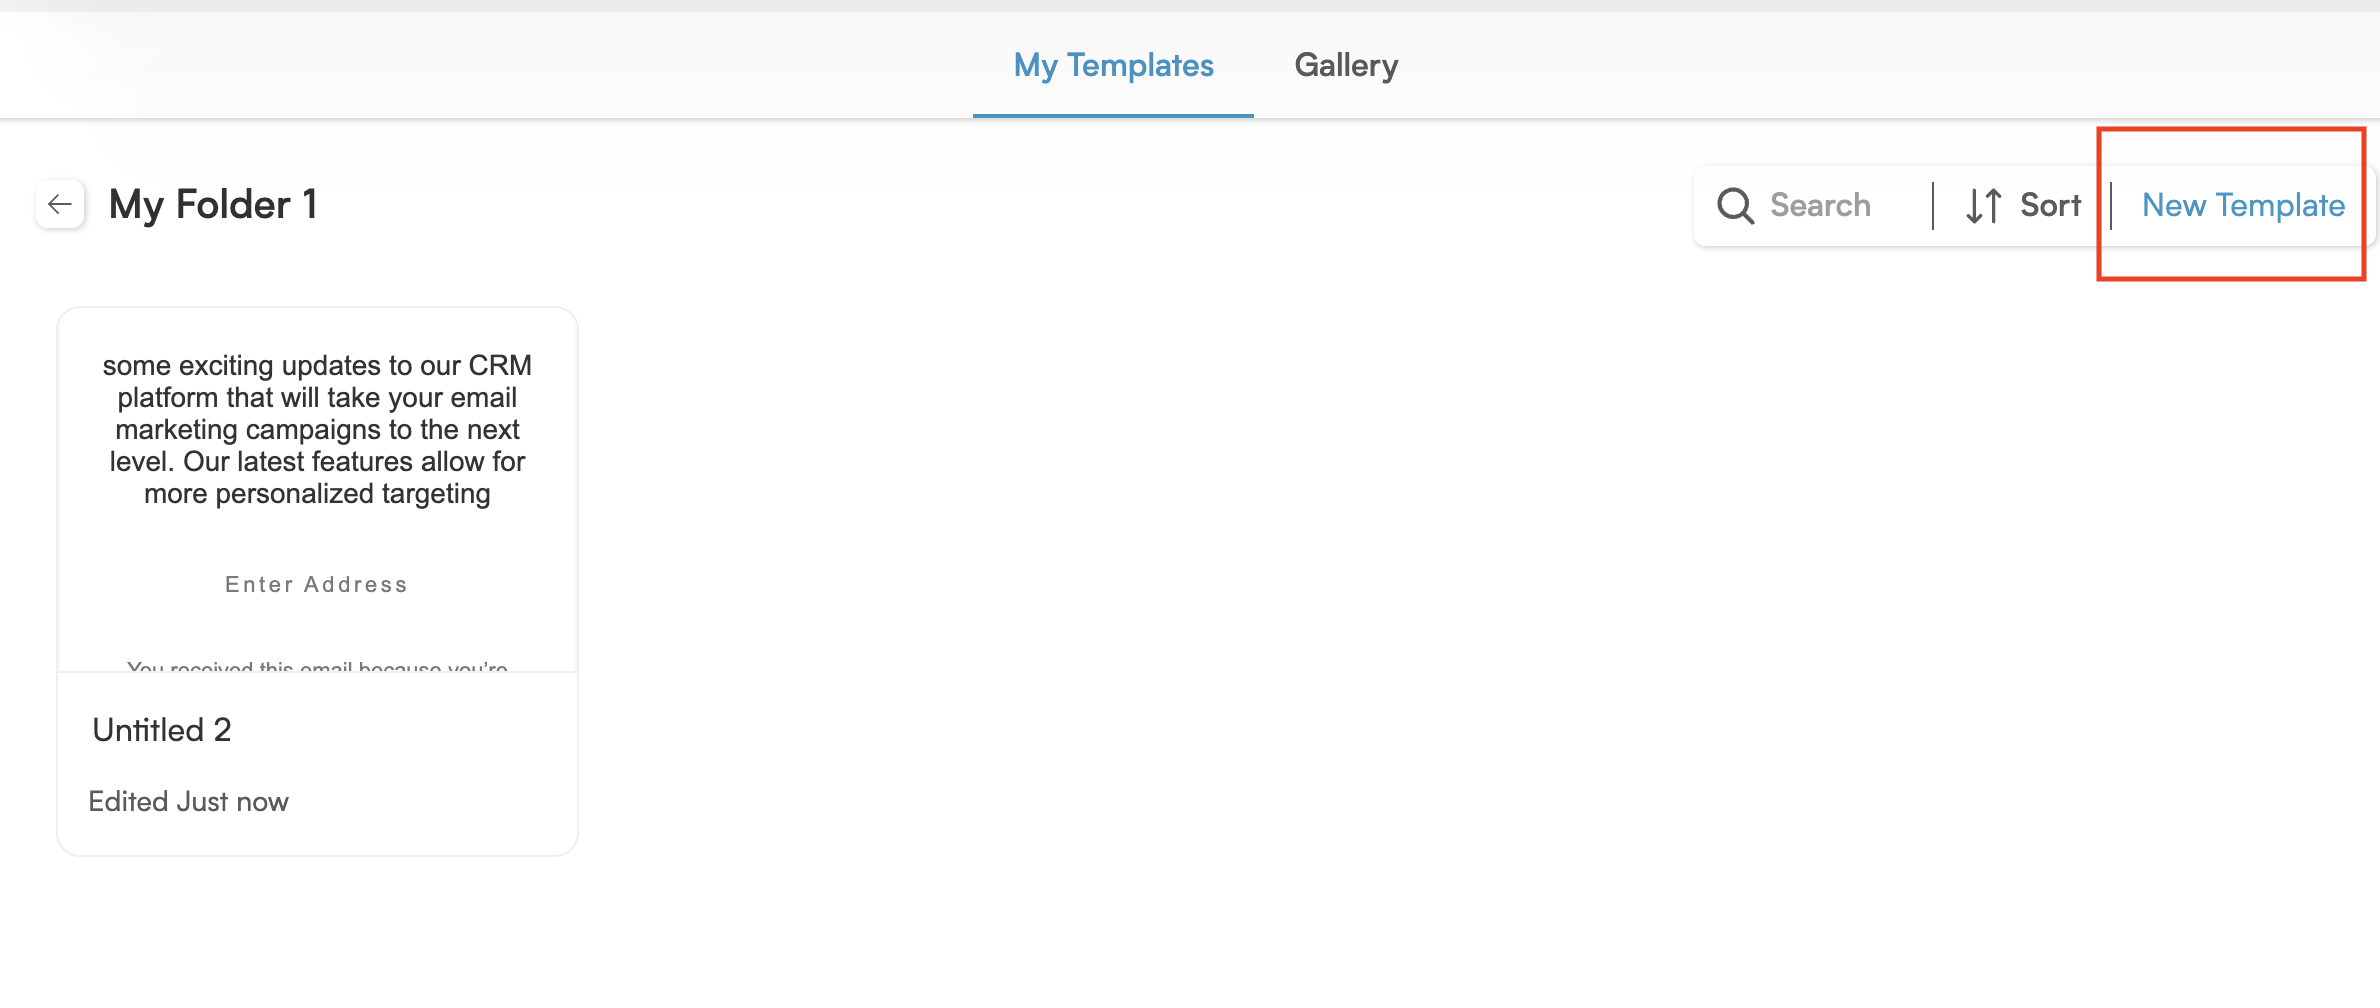
Design Time! Clicking "New Template" will whisk you away to the template design screen, where you can start crafting your new email.
Good to Know: Any template you create this way will be neatly stored and visible only inside this specific folder, helping you keep everything perfectly organized!
Organize Your Templates Effortlessly! Here's how to add a template to a folder:
Navigate to Your Templates: First, head over to the "My Templates" section. This is where all your fantastic templates are stored!
Find Your Template: Take a look at your list of templates and locate the one you'd like to organize into a folder.
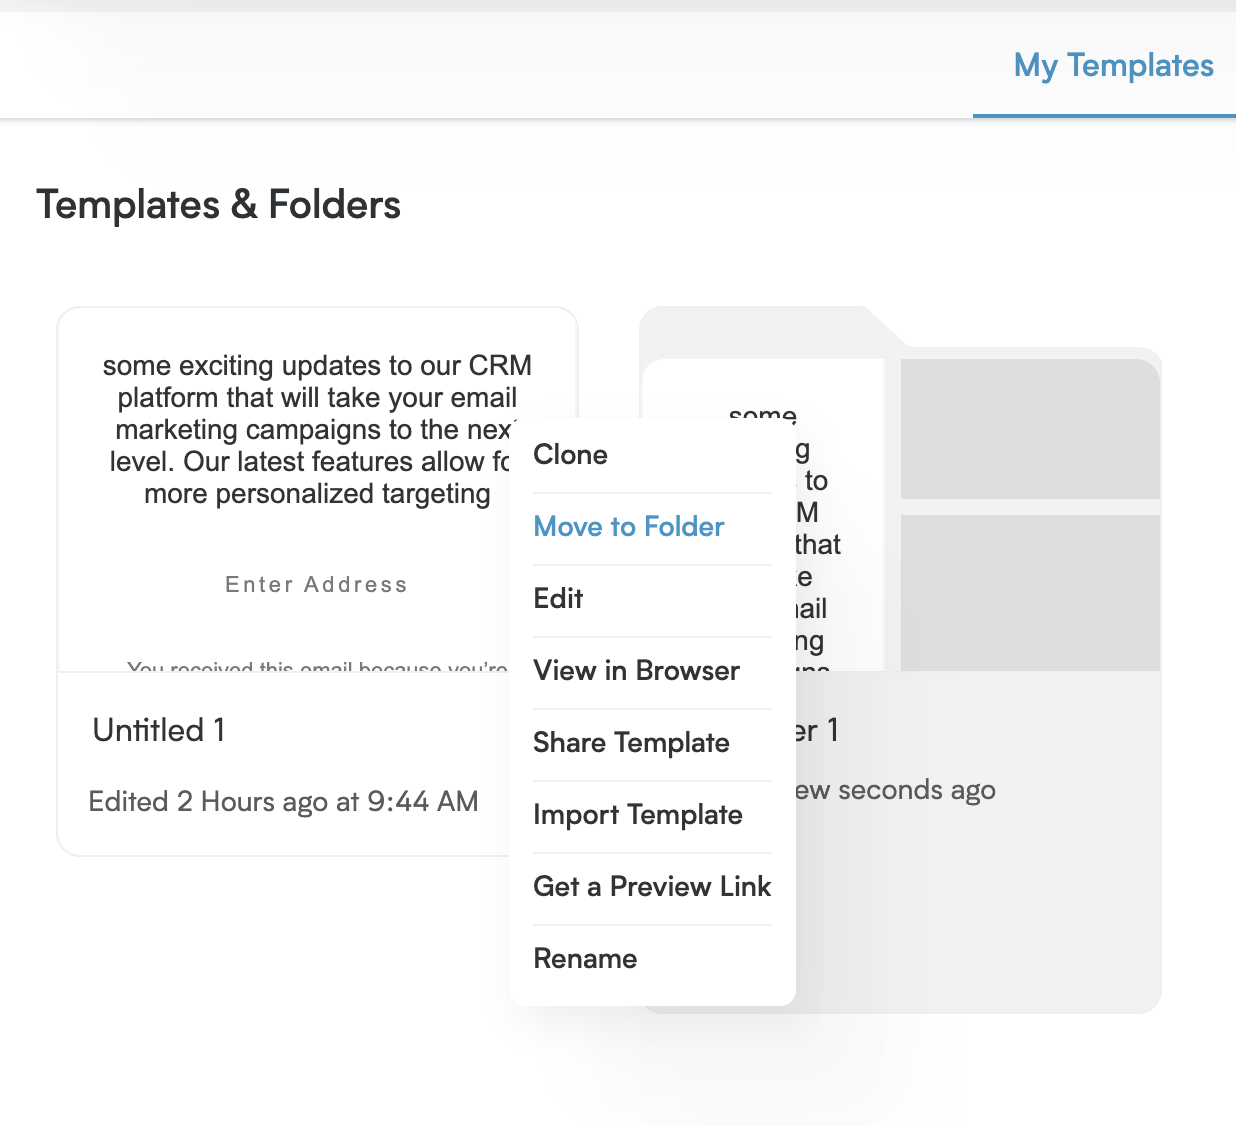
Access the Options Menu: Once you've found your template, simply hover your mouse cursor over it. You'll see three little vertical dots appear – click on these! This opens up a menu of options.
-
Choose "Move to Folder": From the menu that pops up, select the option that says "Move to Folder."
-
Select or Create a Folder: A window labeled "Move to Folder" will appear. Here, you have two great choices:
Use an Existing Folder: If you already have a folder where you'd like to place the template, simply click on its name.
Create a New Folder: If you want to create a brand-new folder for your template, look for an option like "Create New Folder," type in the name you want for your new folder, and then select it.