
Our Availability Schedule feature empowers your users to define exactly when they are available for meetings and appointments. This smart tool ensures bookings only happen during their designated timeframes, helping to keep their calendar organized and prevent any scheduling surprises outside of working hours.
Why You'll Love It:
You're in Control: Users can easily manage precisely when bookings can occur.
Avoid Clashes: Say goodbye to double-bookings or appointments scheduled during unavailable times.
Tailored for You: Enjoy the flexibility to set up different availability for various types of bookings.
What You Can Do:
Set Your Hours: Pinpoint specific days of the week and the exact time ranges you're open for appointments.
Flexible Assignments: Easily assign unique availability schedules to different types of bookings, giving you ultimate control over your time.
Let's get started making an Availability Schedule for your team!
First, go to Bookings>Availability Schedule. You'll be greeted with this screen:
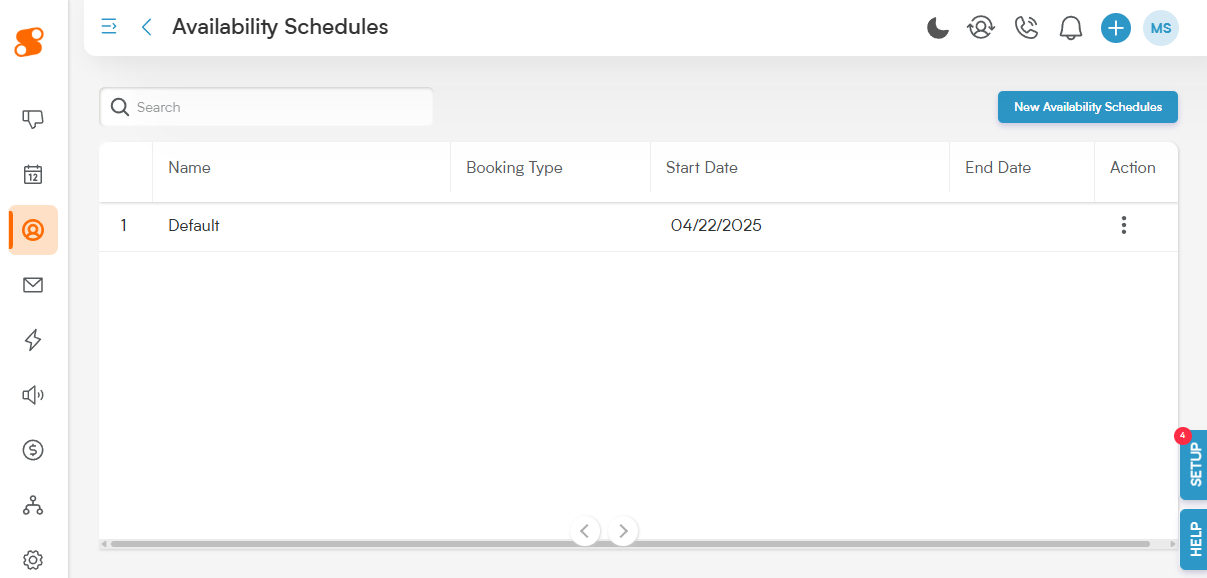
From here, click on the blue "New Availability Schedule" button at the top right of the page.
You'll be taken to this pop up window, asking for more information about the schedule you want to create:
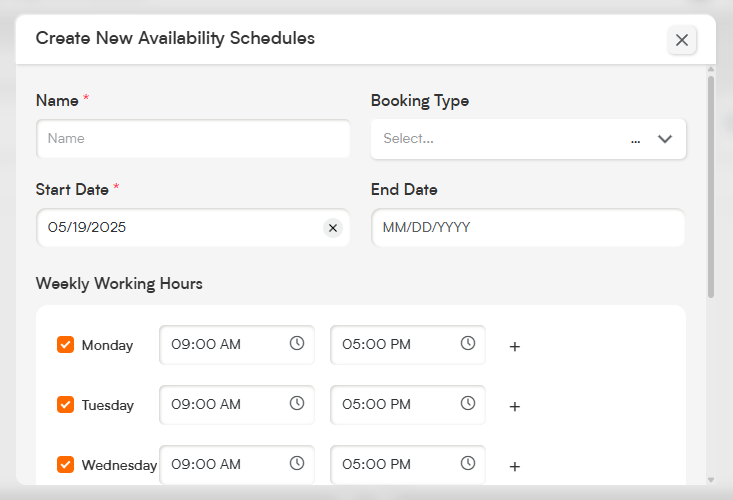
Name: Start by choosing a name for the schedule - this can be anything you'd like!
Booking Type: This is the booking type that this schedule will apply to - you can choose multiple types by clicking the dropdown button and selecting each type you'd like to add to this schedule.
Start Date: This will be the day this schedule will first become active.
End Date (optional): If this is a temporary schedule, you can add an end date for when this schedule will no longer be active here.
Weekly Working Hours: These are the days and hours that this schedule will be active. Pressing the + button will allow you to have multiple blocks of availability per day (for example, if you want to account for a 1 hour lunch that runs from 12-1PM, you can press the + button, and have the first shift be from 7AM-12PM, and second shift from 1PM-4PM). Hovering to the right will show the "Apply to All" button, which will apply those same time block(s) to all days on the schedule.
When you're done creating the schedule, press the "Save" button, and your schedule will be added to your Smackdab system and you'll be taken back to the Availability Schedule page.
Now you'll be able to see your added schedule, and by clicking the three vertical dots icon on the right hand side, you can Edit or Delete your schedule.
Note: The Default schedule cannot be deleted, but it can be edited.